BedderScript — Getting Started
From the Asset Store to a live in-game editor in about two minutes.
1. Install
From My Assets: Window → Package Manager → My Assets → find ArTchie-Bedder-Suite →
Download → Import. Unity shows the import list — click Import and let it compile.
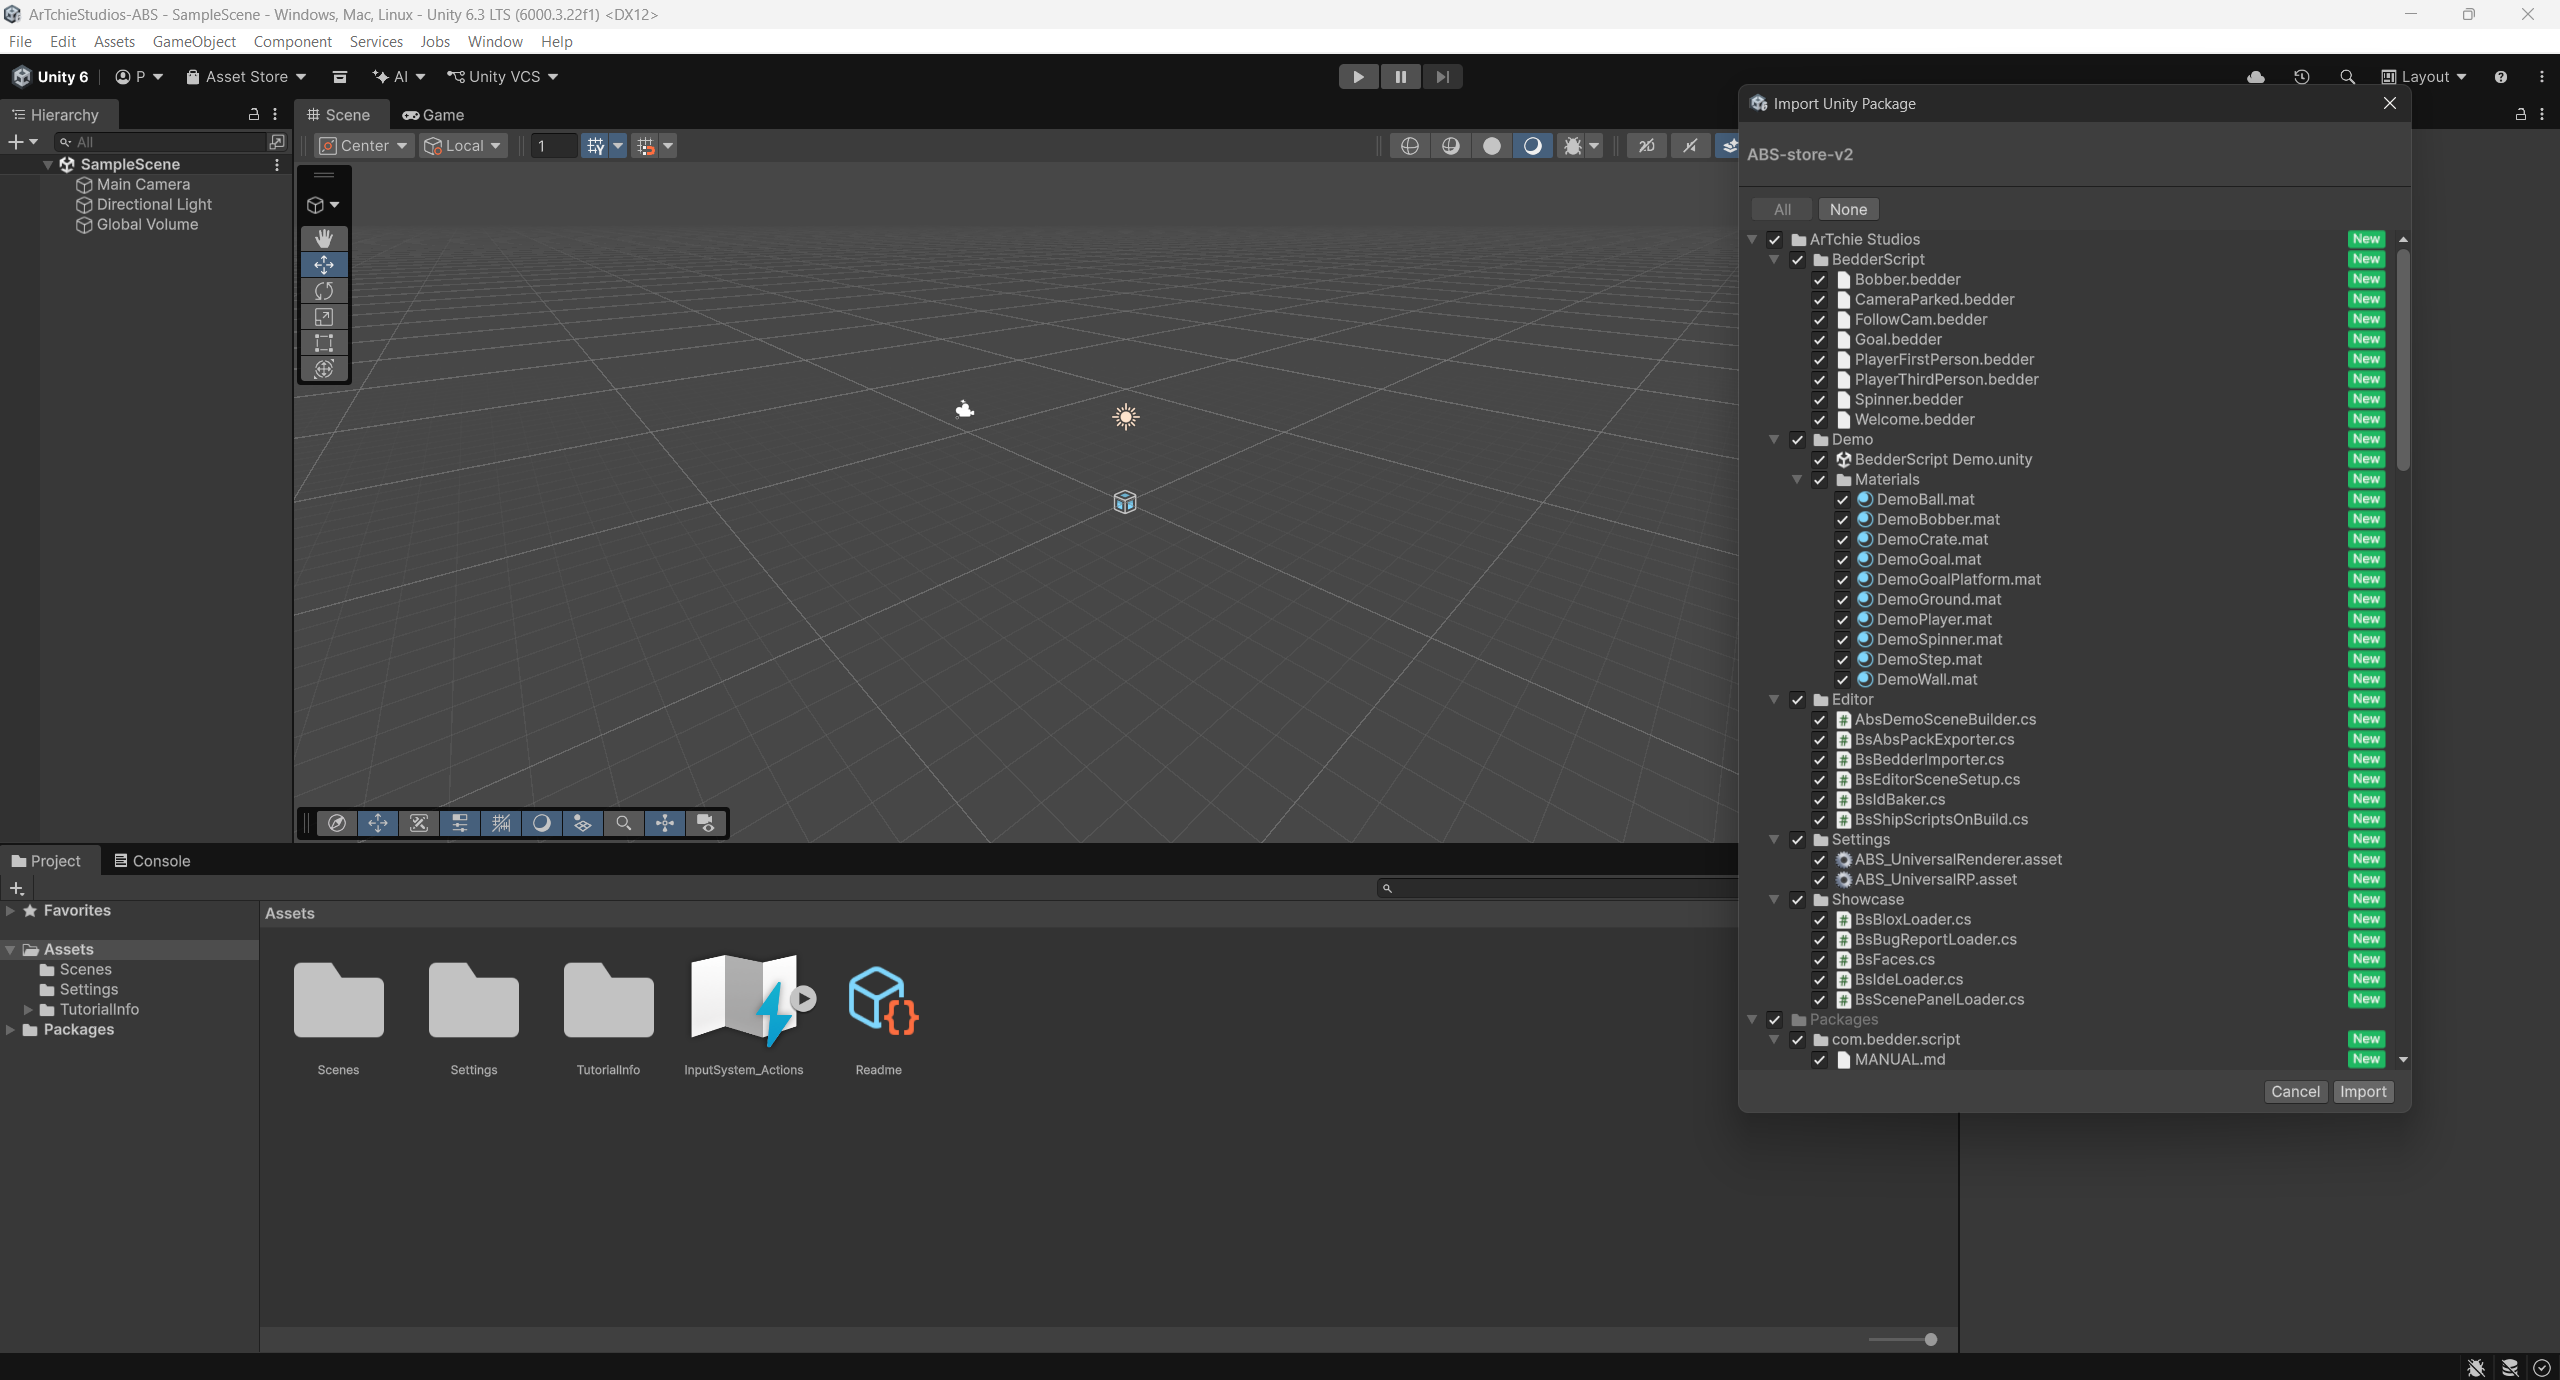
Requirements: Unity 6.0 LTS or newer. The Input System and uGUI packages are pulled in automatically. Any render pipeline works; the included demo settings target URP.
2. What lands in your project
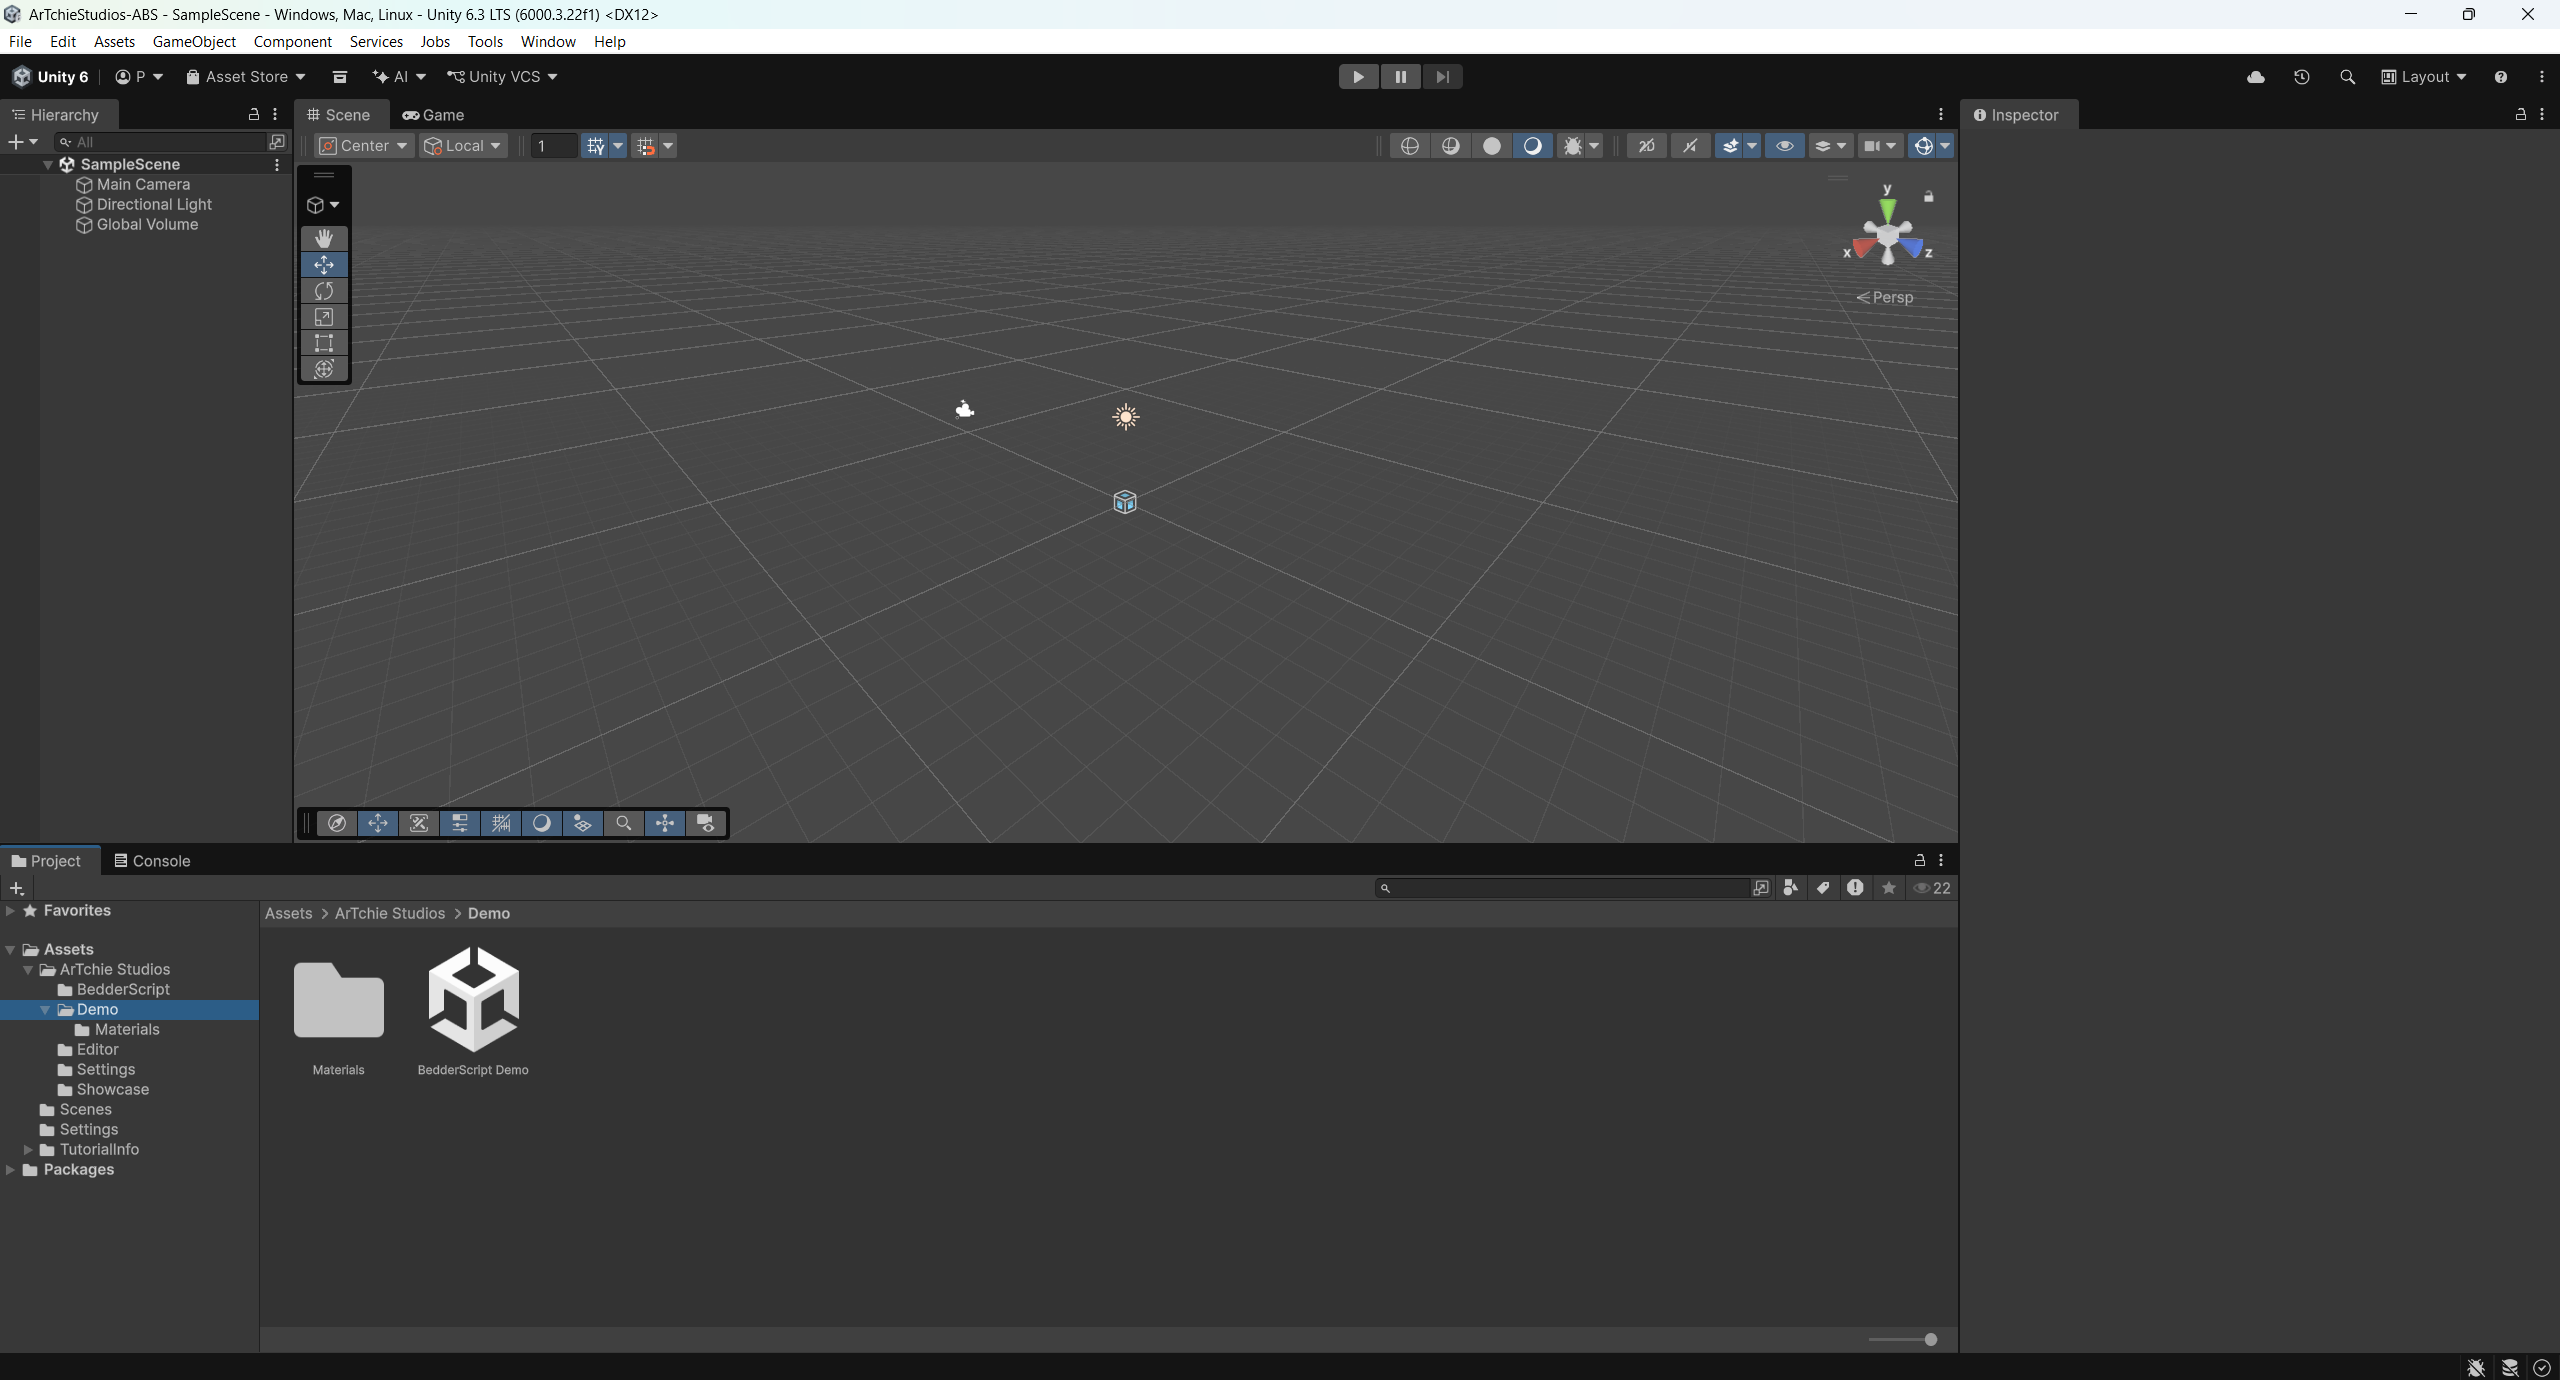
One folder, Assets/ArTchie Studios/, and everything in it is yours — full C# source, nothing installed into Packages/, nothing pointing outside your project:
ArTchie-Bedder-Suite/— BedderScript: the language, VM, and the in-game editor.ArTchie-Suite/— the editor kits: Core, Atlas, Anvil, Rivet, Scribe, Charter, Folio.ArTchie-AI/— the optional in-editor agent chat.- Beside them, the integration layer:
Editor/(setup tools + the build hook) ·Showcase/(the F-key face loaders) ·BedderScript/(your scripts live here) ·Demo/andSettings/(the demo course and its URP assets).
2½. Take the demo for a spin
Open Assets/ArTchie Studios/Demo/BedderScript Demo.unity and press Play. It's a tiny
3D platformer where every behavior is a BedderScript — there is no C# gameplay code in
the scene:
| Object | Script | What it shows |
|---|---|---|
| Player (the bean) | PlayerThirdPerson |
Third-person movement, jumping, camera-relative steering |
| Main Camera | FollowCam |
Mouse-orbit follow camera |
| Spinner | Spinner |
Continuous rotation — the windmill bar |
| Bobber | Bobber |
A sine-wave elevator platform |
| Goal | Goal |
Trigger events + a celebration |
| Crate | Welcome |
The starter script (and it's pushable — walk into it) |
WASD moves, mouse looks, SPACE jumps, SHIFT sprints. Climb the steps, ride the Bobber up, and hop to the gold Goal block.
Then the fun part: press F1, open PlayerThirdPerson, change jump_height to 3, and
hit ▶ APPLY — mid-run. A first-person controller ships too: PlayerFirstPerson has the
two-step swap guide in its header comment.
3. One click: arm your scene
Open any scene you're working on — your game scene, not a special one — and run:
Tools → ArTchie → BedderScript → Set Up Bedder Editor in Scene
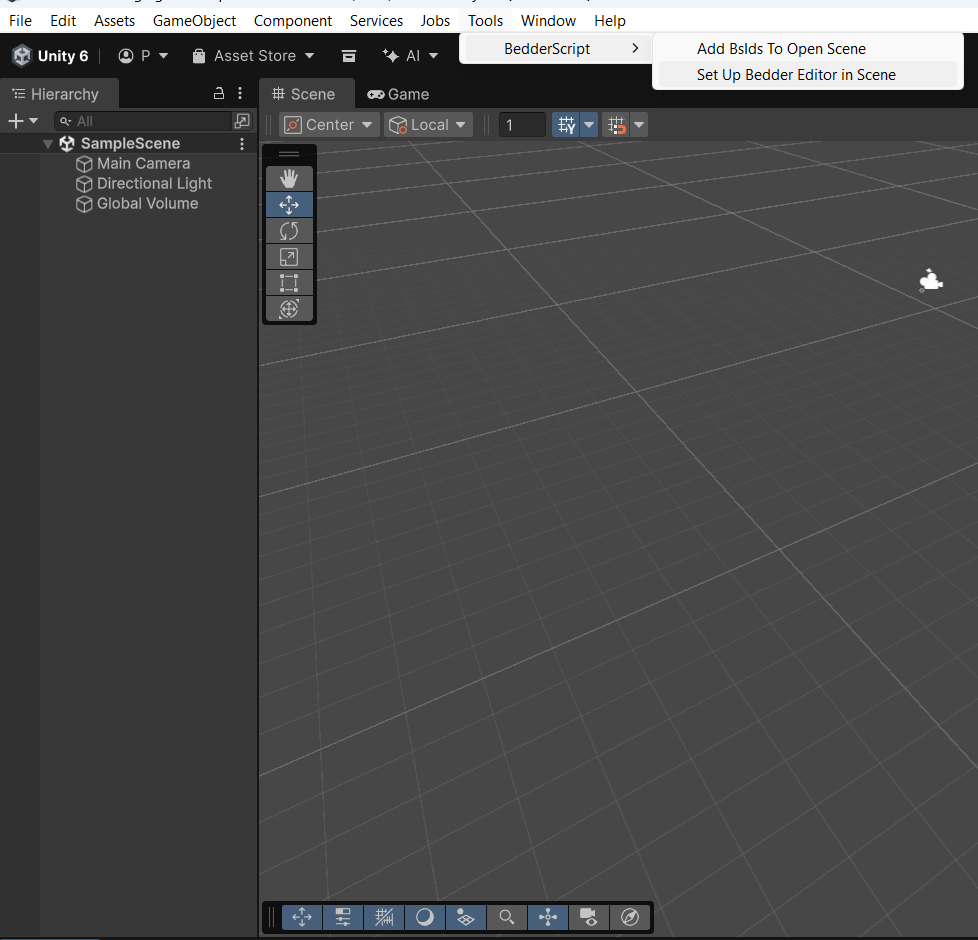
That one click:
- Creates
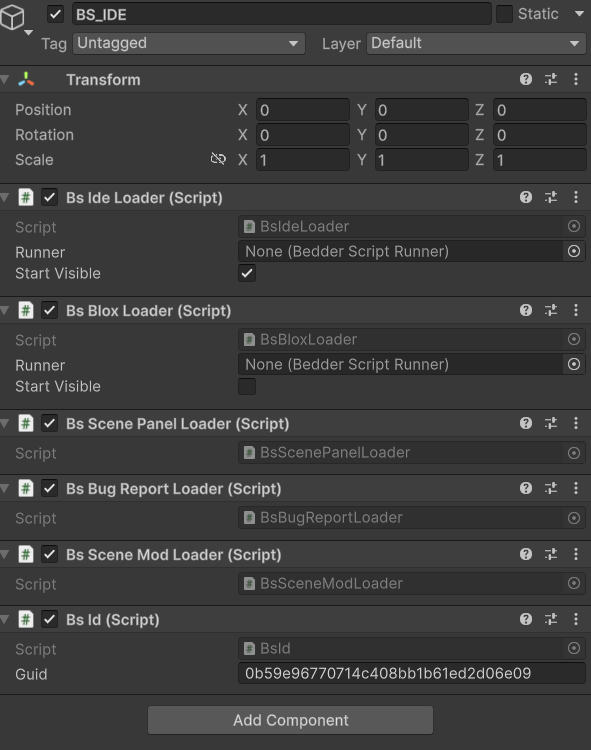
BS_IDE— the in-game editor rig (IDE, Blocks, Scene panel, Bug reporter + the persistence loader) - Ensures a UI EventSystem (new Input System module)
- Stamps a BsId on every object in the scene — the permanent sticker that lets runtime scene edits survive renames, moves, and even game updates
Here's the BS_IDE object it created — each face is just a small loader component, so
there's no magic to trust and nothing you can't remove:
The Console confirms what it did:

4. Press Play — meet the four faces
| Key | Face | What it is |
|---|---|---|
| F1 | IDE | Edit .bedder scripts — ▶ APPLY hot-swaps them into the running game |
| F2 | Blox | The SAME script as blocks — edits regenerate the text live |
| F3 | Scene panel | Hierarchy, inspector, gizmos, asset placement — a level editor in-game |
| F4 | Bug reporter | Name / repro / screenshot → saved to disk, from inside the game |
F1 — the IDE. The included Welcome script is right there in the Explorer — open it,
follow its comments, edit, ▶ APPLY:
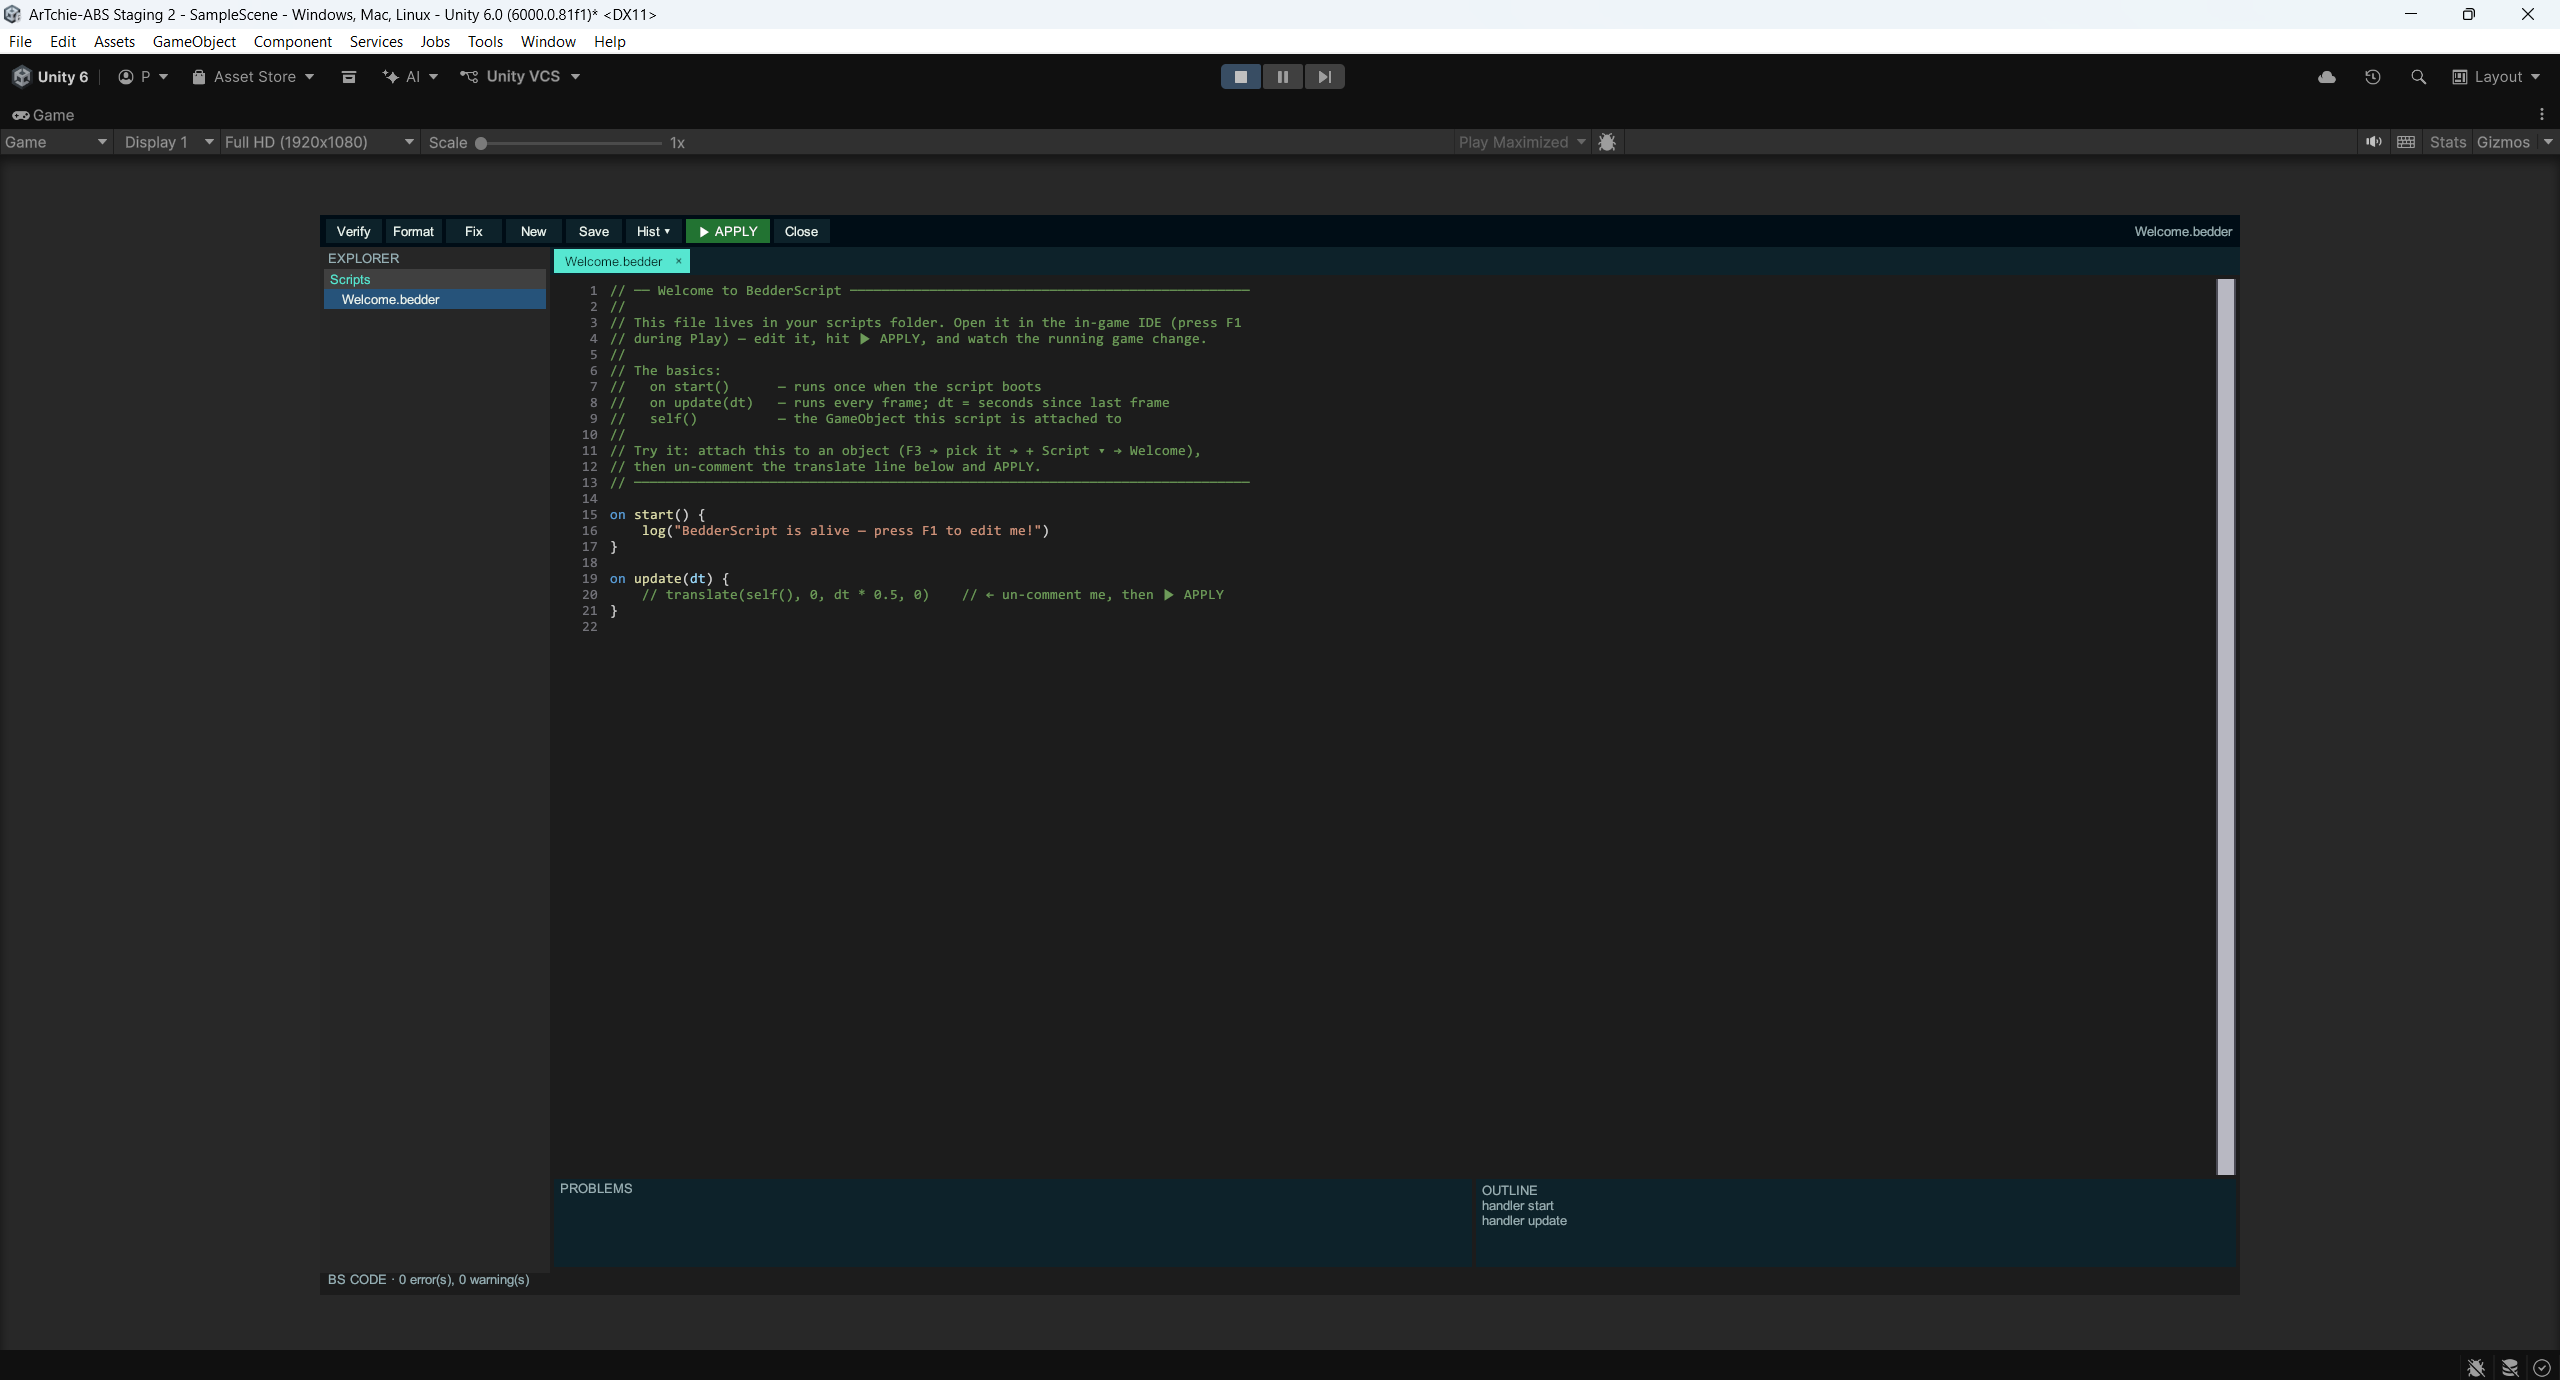
(With no file open, the IDE shows a clean slate and won't let you type into nothing — click New.)
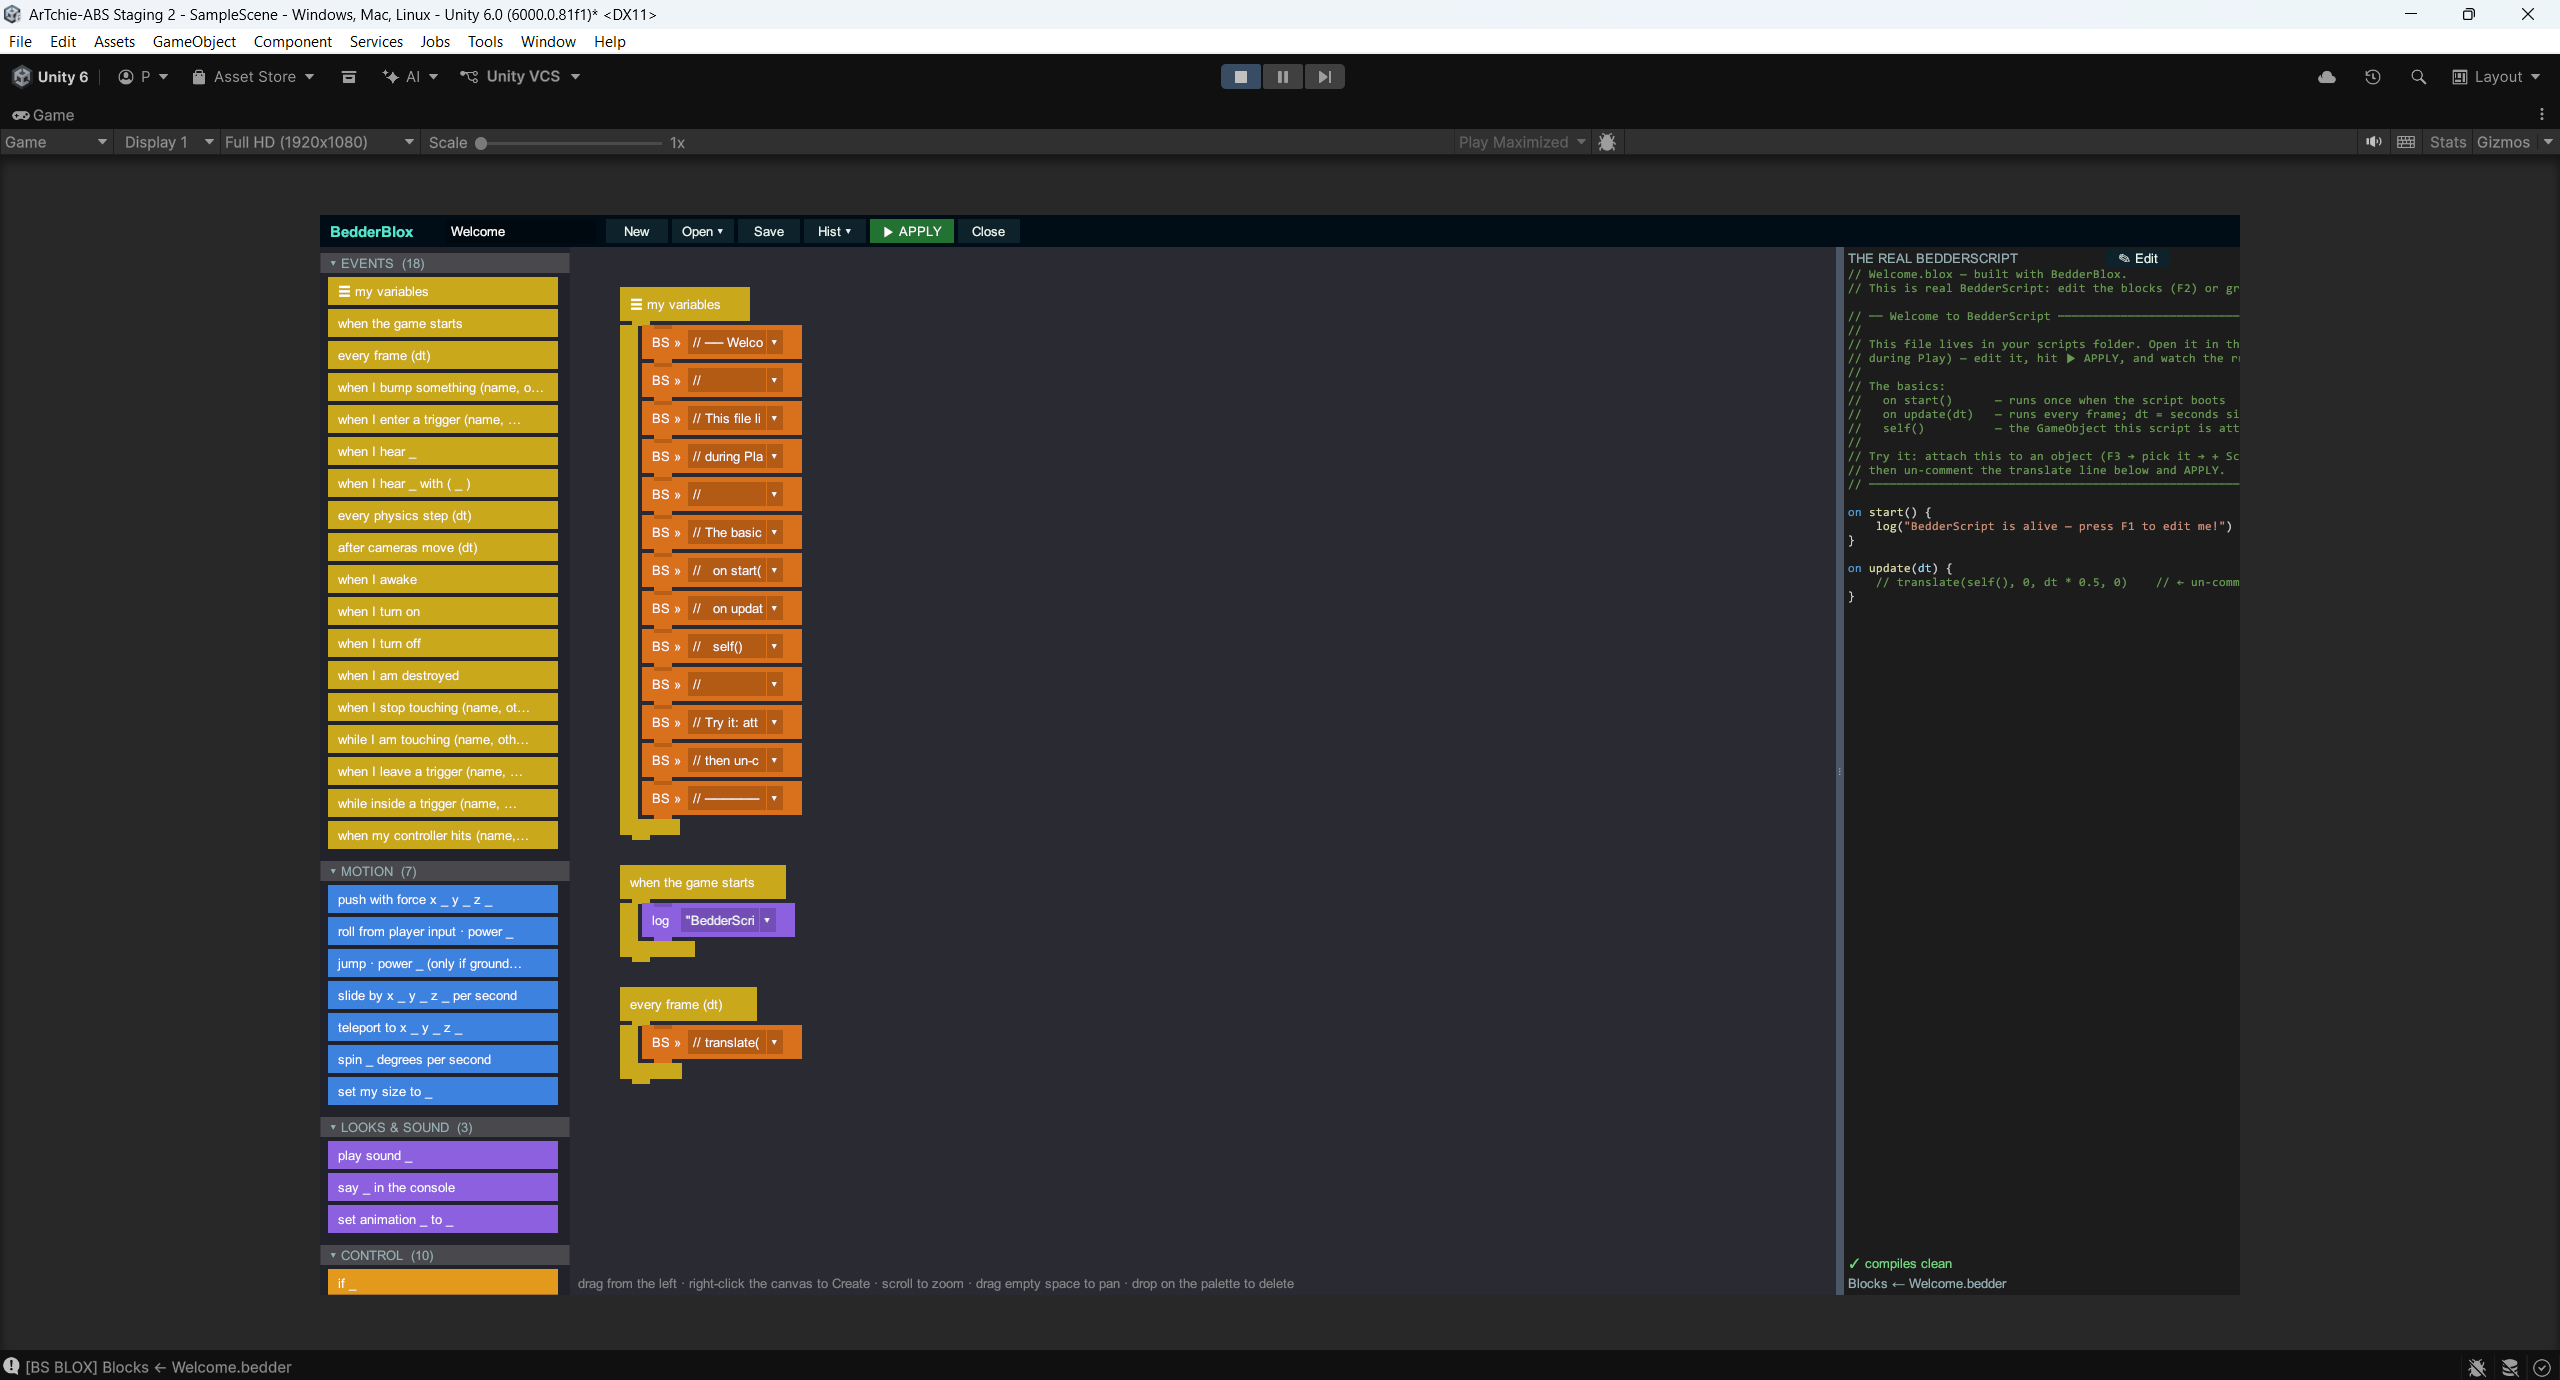
F2 — the same script, as blocks. Not a separate system: blocks derive from the text and every block edit regenerates it. One script, two faces:
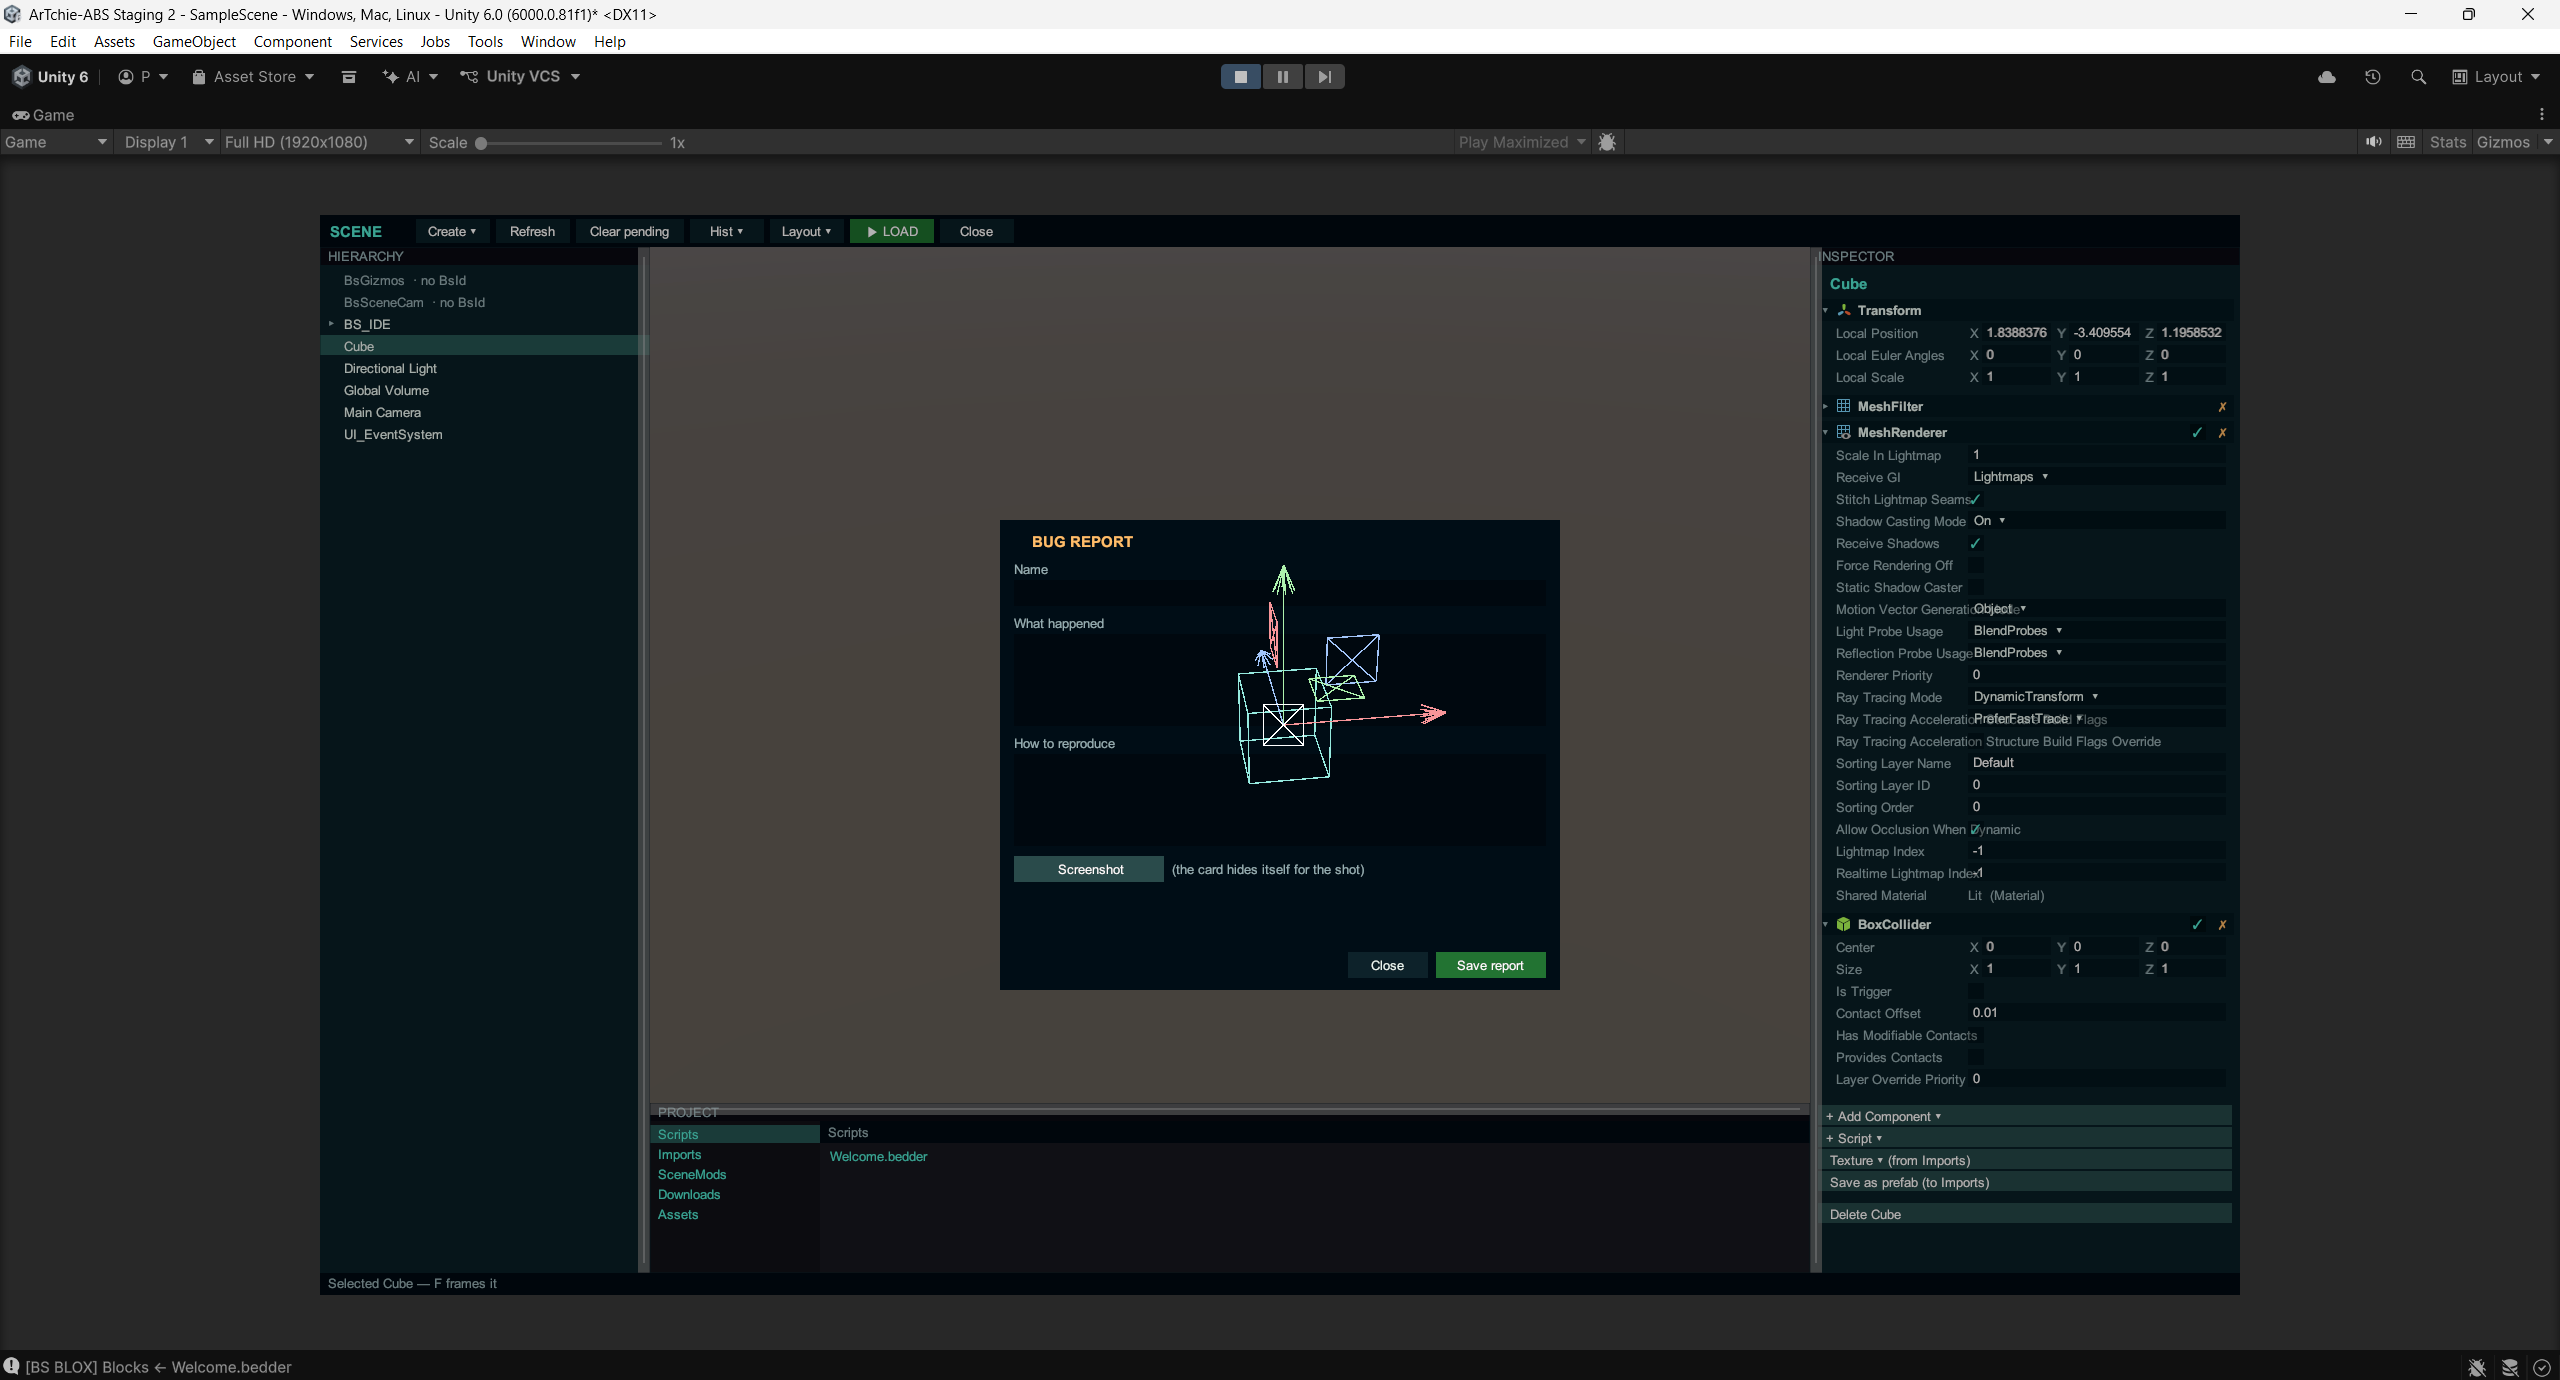
F4 — the bug reporter, an overlay that opens over anything (it even hides itself for the screenshot it takes):
5. Your first script
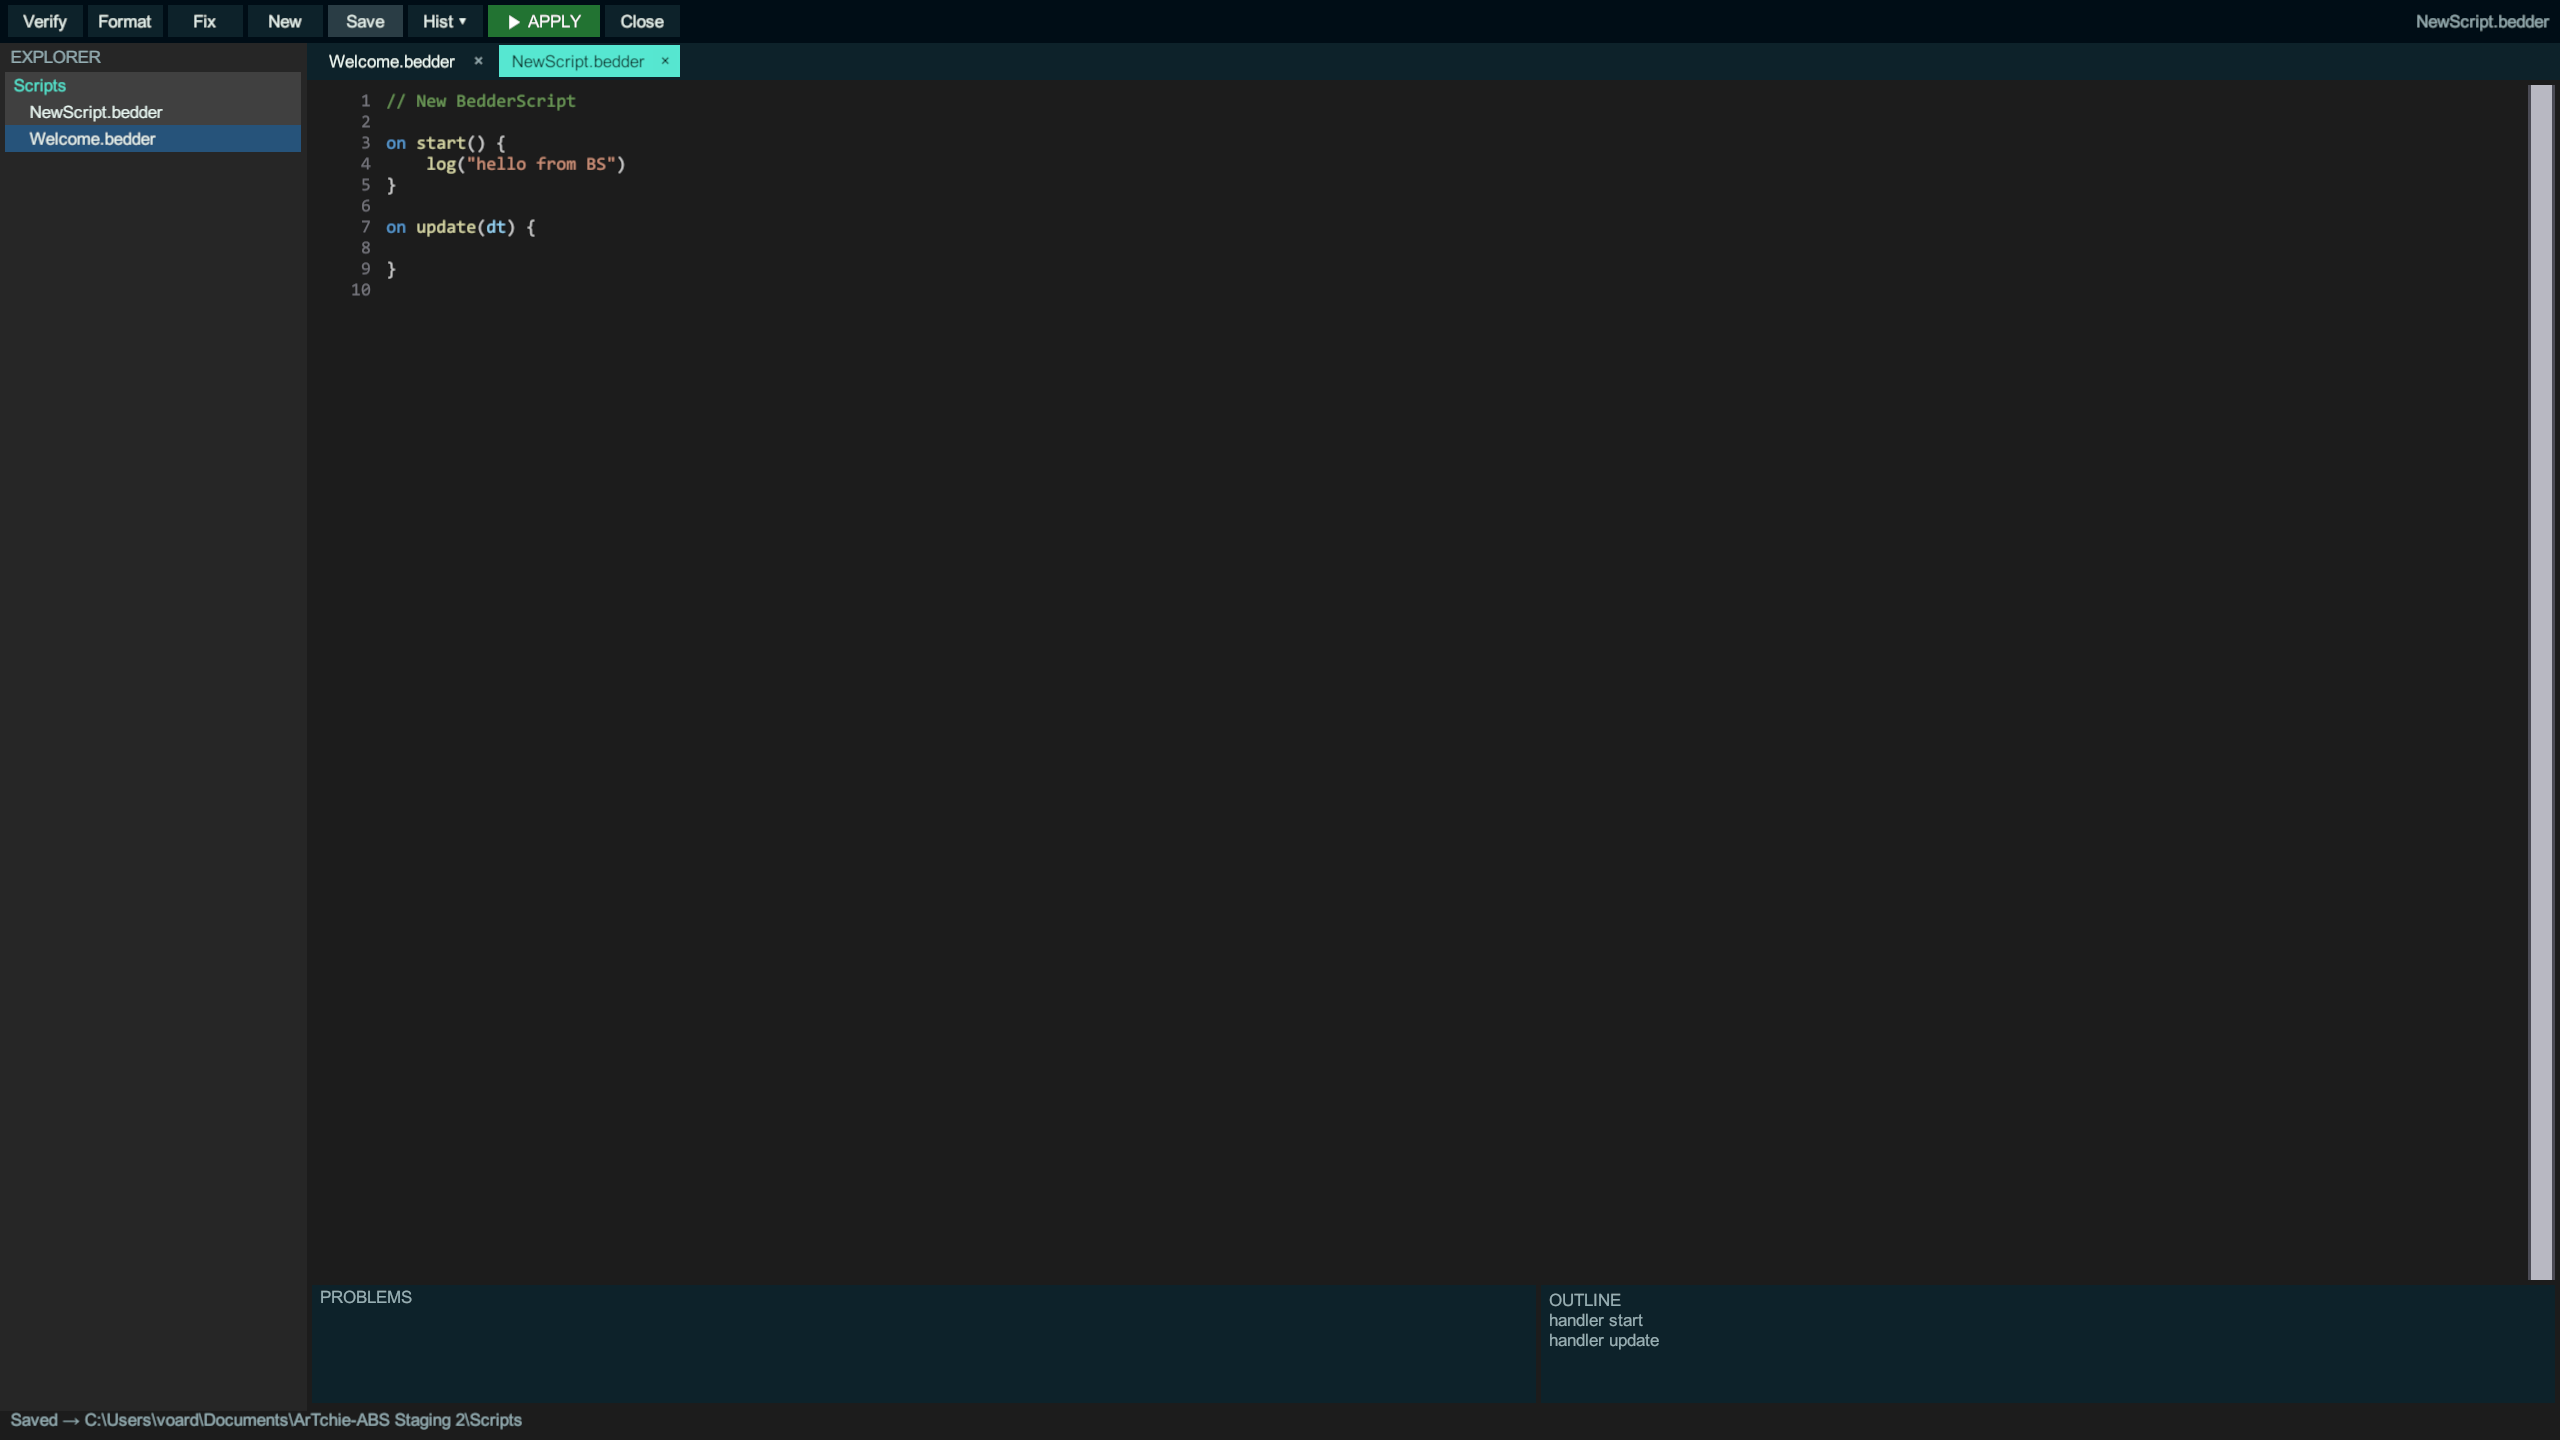
F1 → New → name it (say spinner) → the template appears:
// New BedderScript

on start() {
    log("hello from BS")
}

on update(dt) {

}
Make it do something — spin the object it's attached to:
on update(dt) {
    translate(self(), 0, 0, 0)          // try: rotate via set_rotation, or move it
}
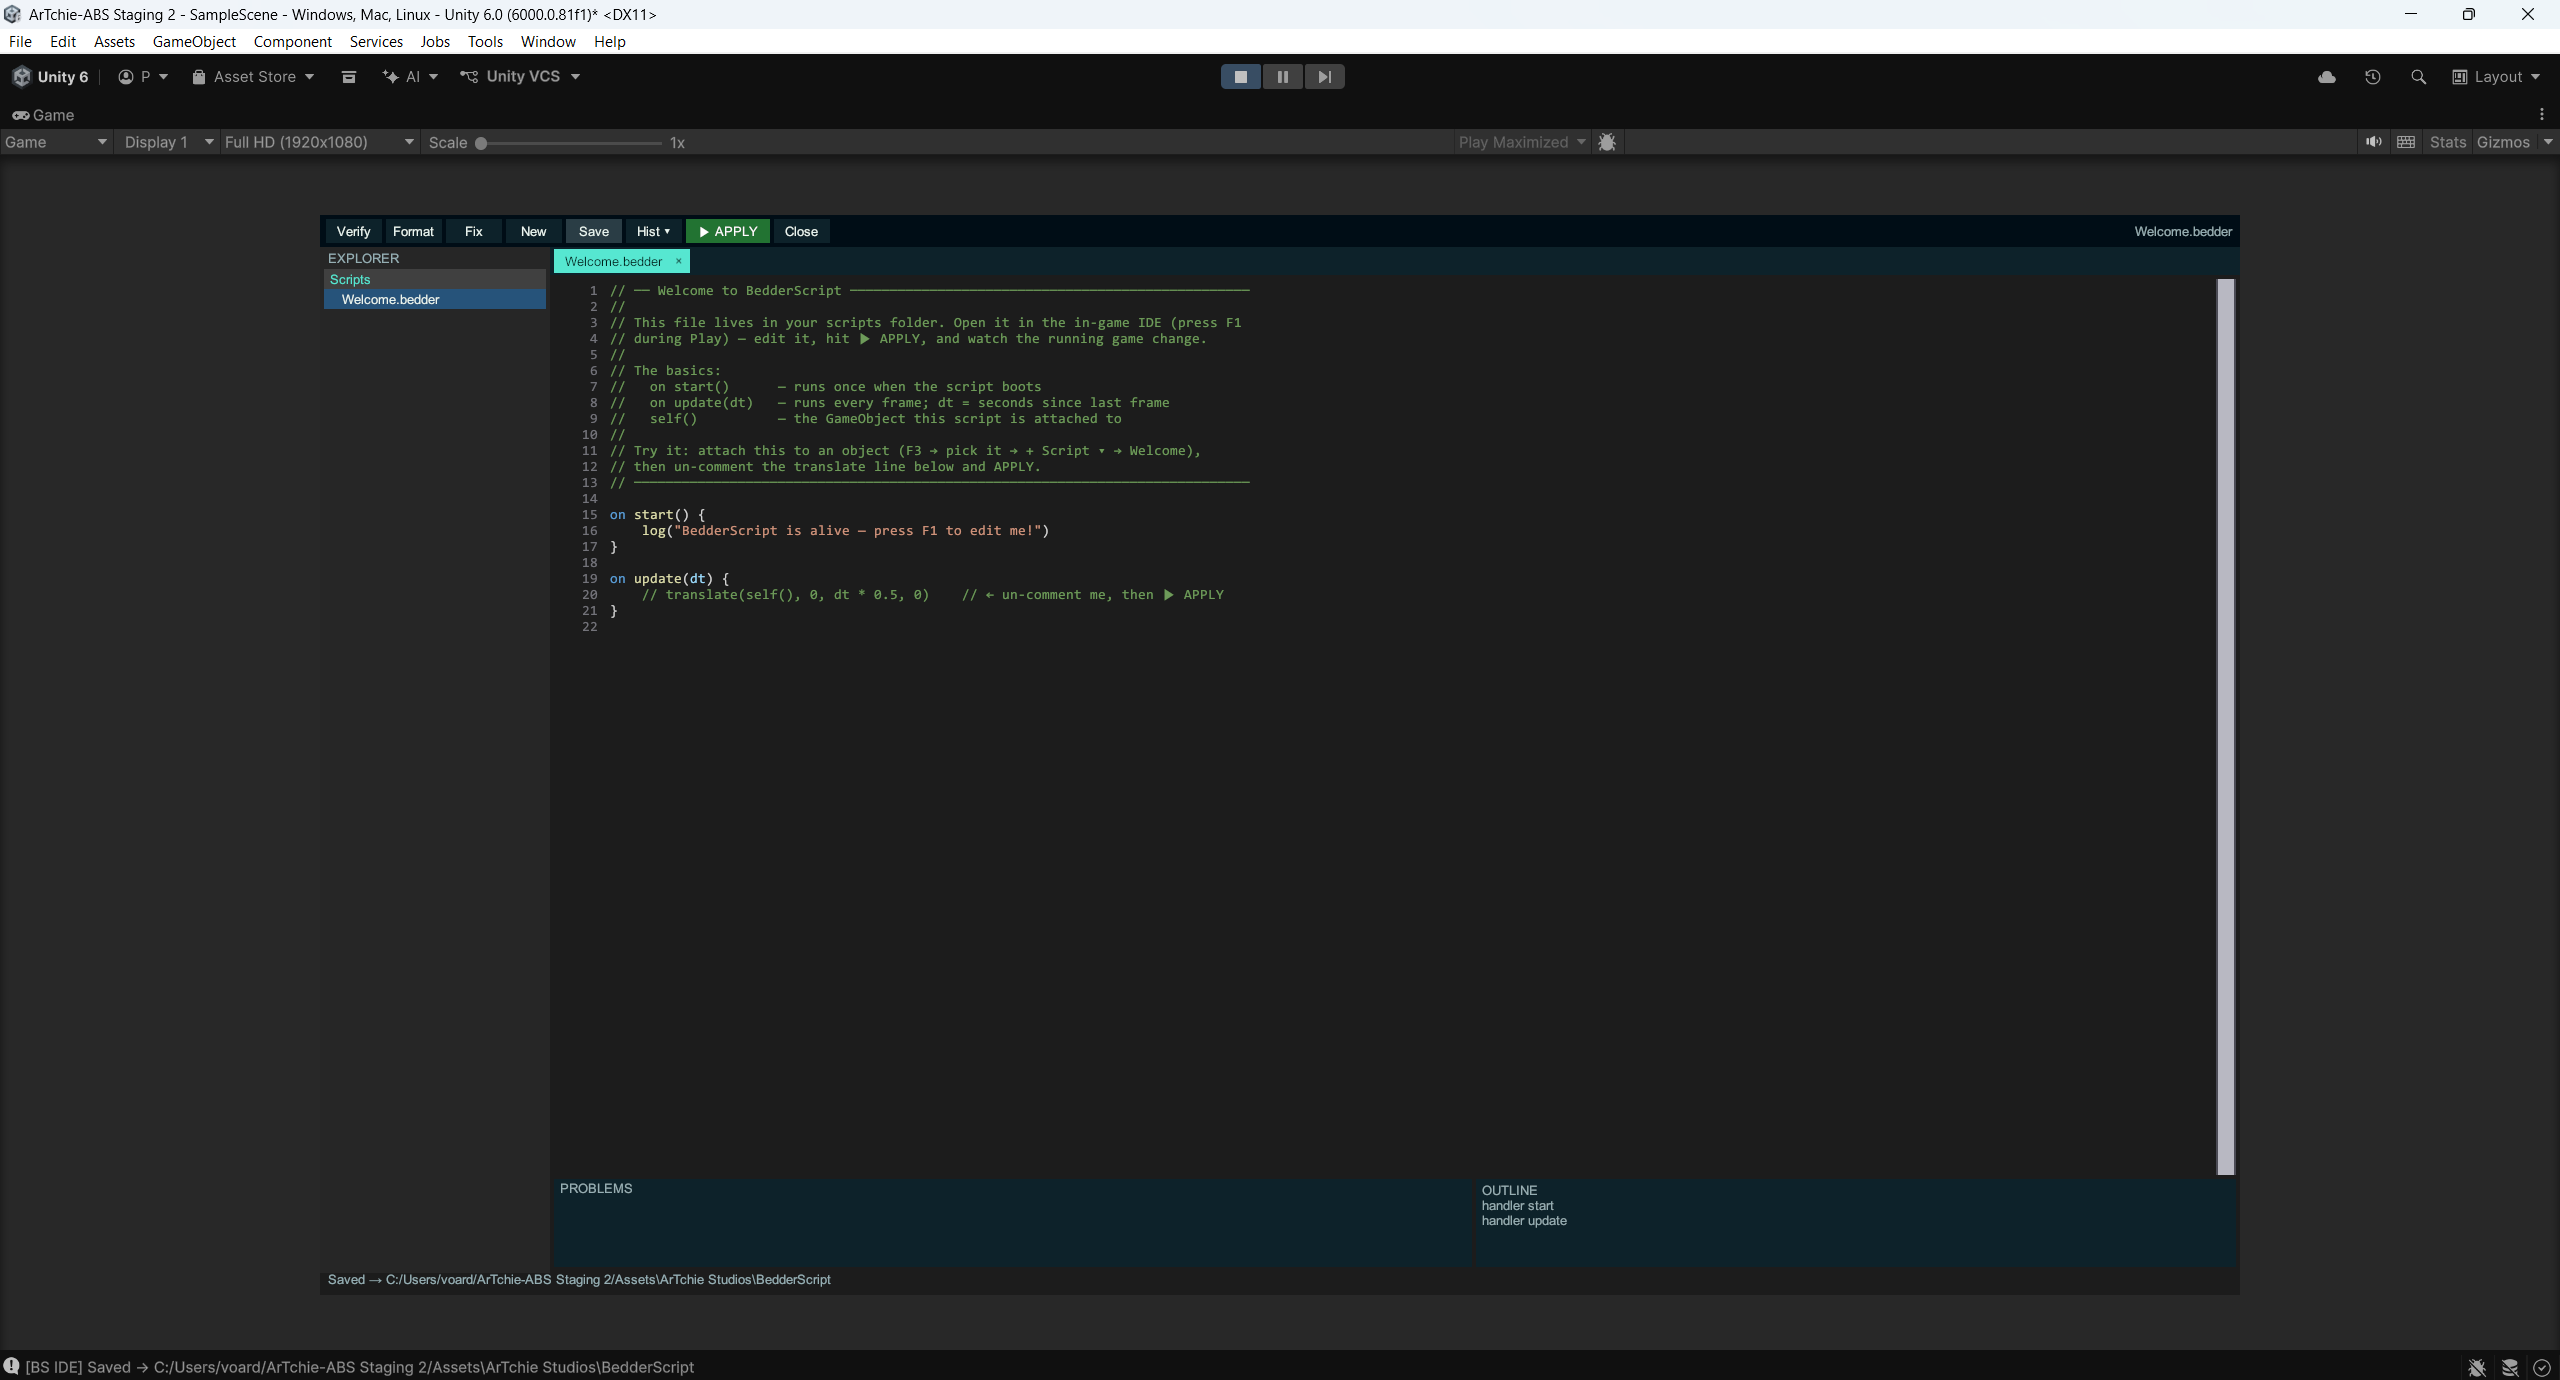
Save writes it to disk — and always tells you exactly where:
6. Put it on an object
Open F3 (Scene panel) → pick any object in the tree → + Script ▾ → choose spinner
→ ▶ LOAD. The script is now running on that object — and because it went through the
scene-op booklet, it's still there next time you press Play.
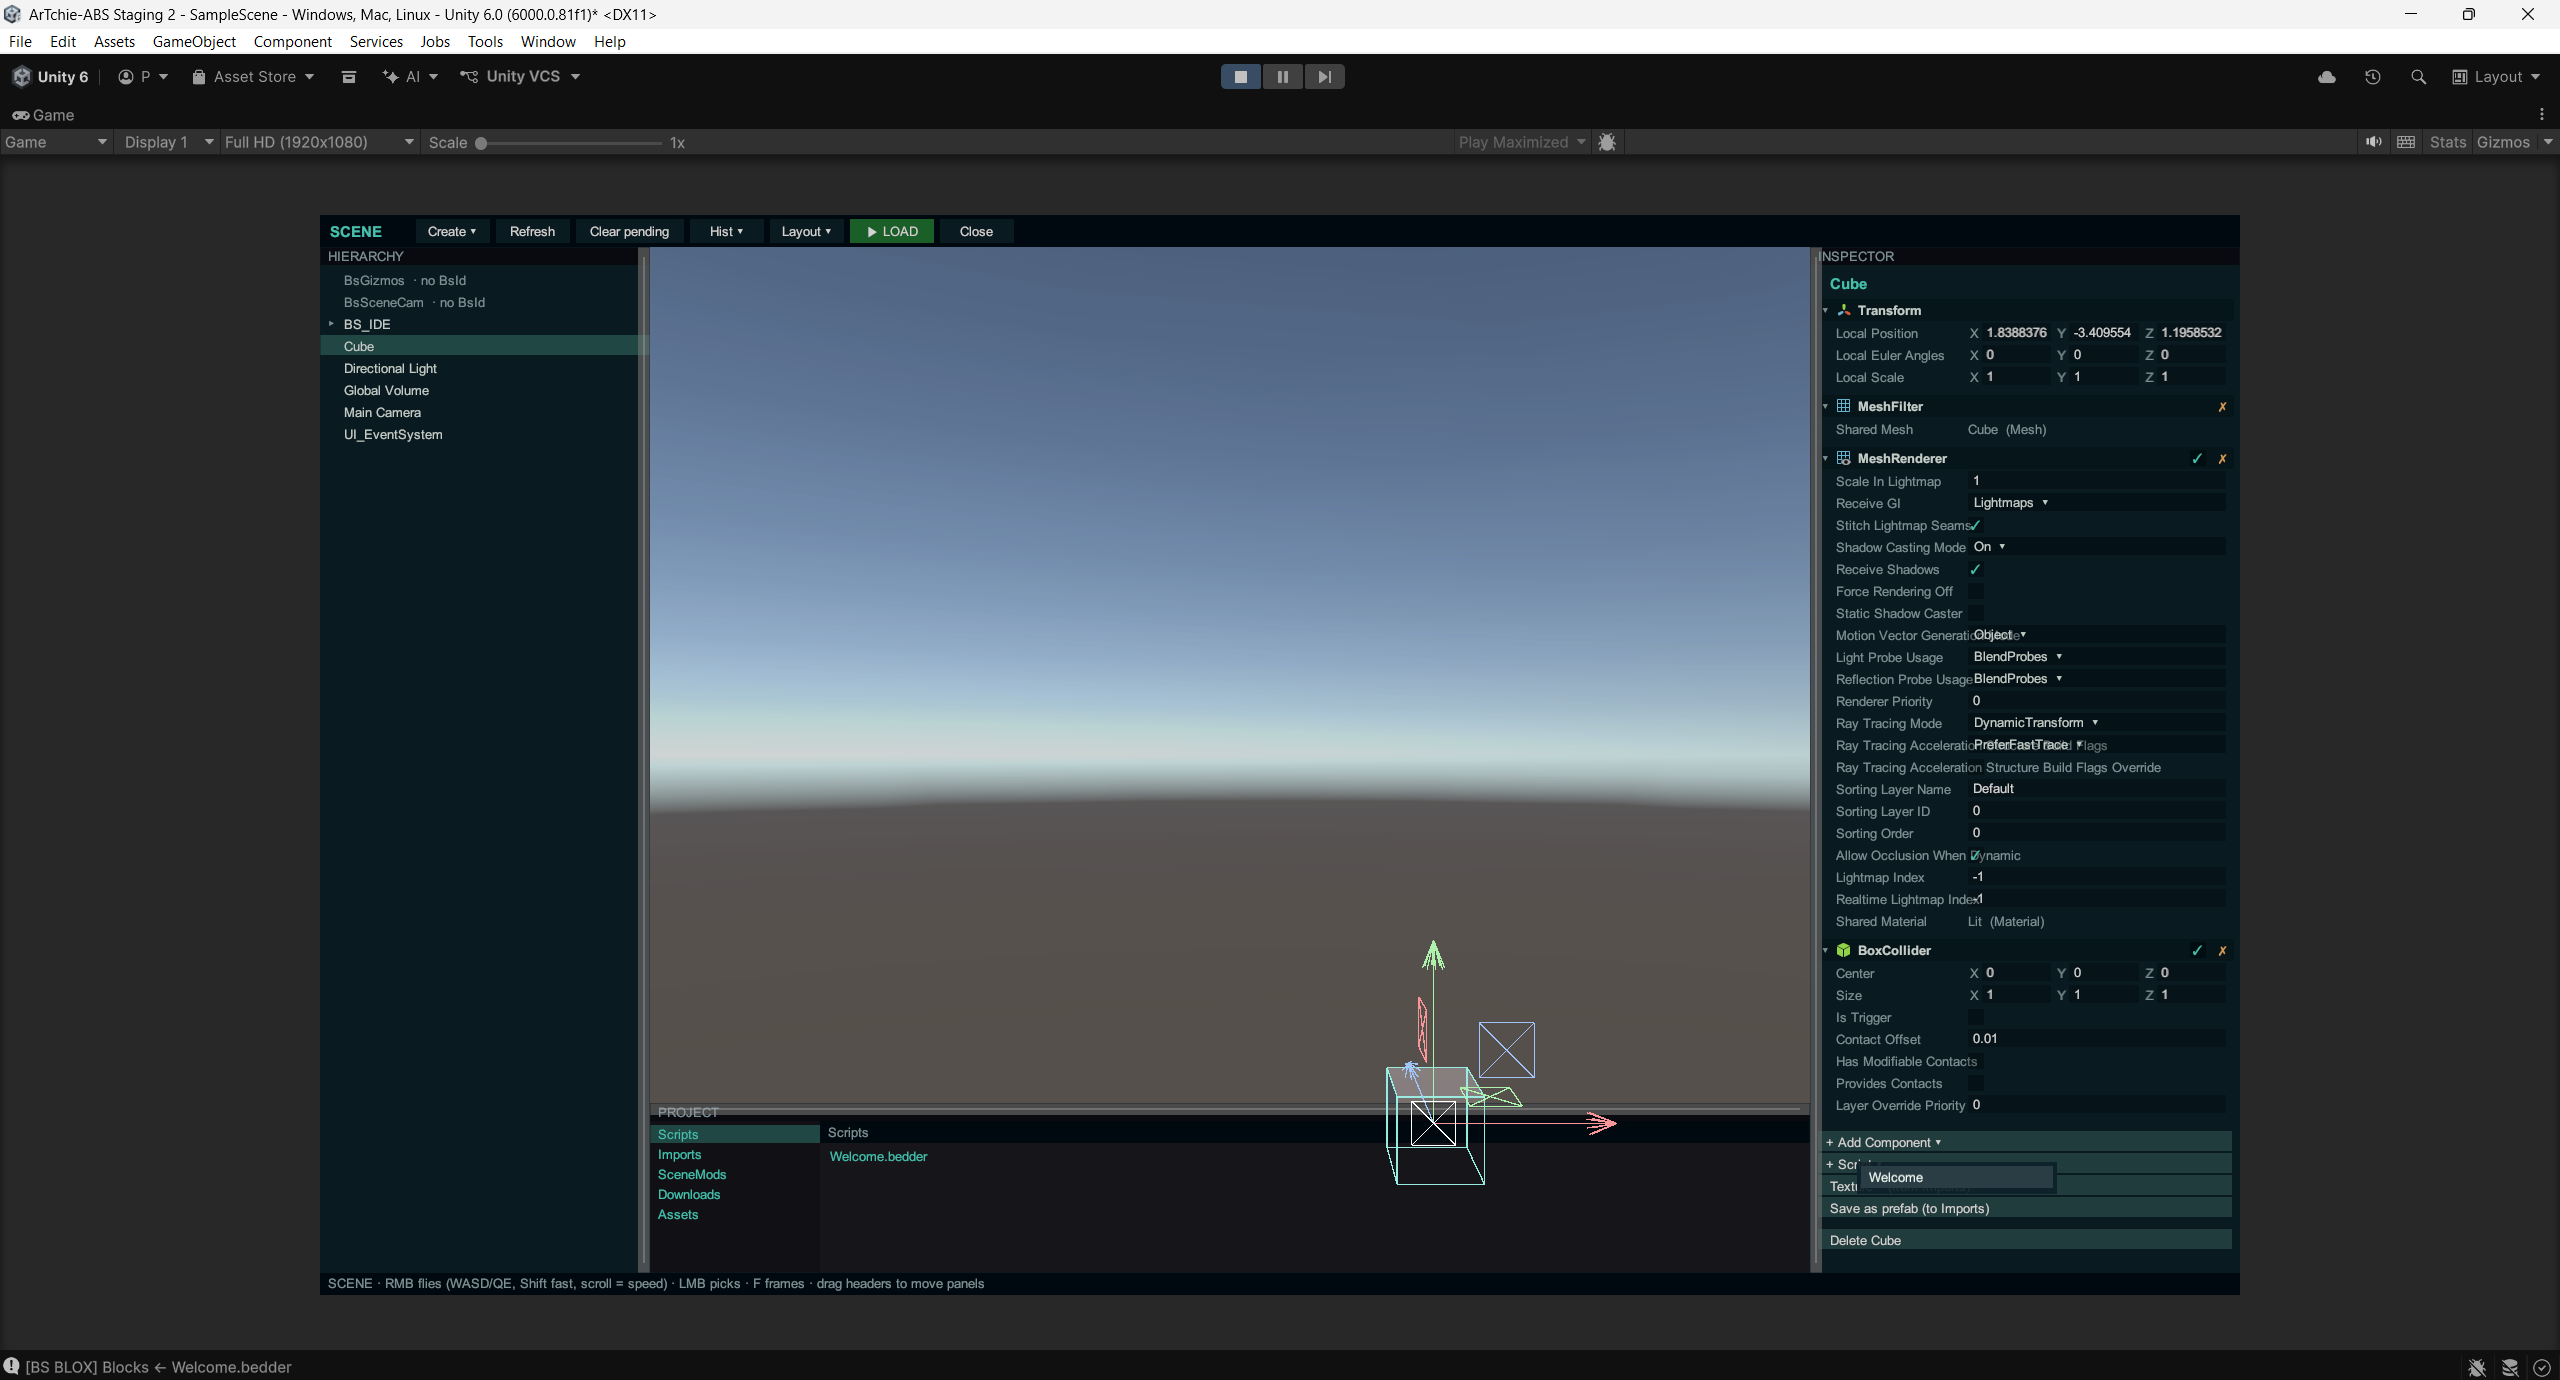
Every action stages an op first — the status bar shows what's pending, and nothing touches the scene until you ▶ LOAD (which also saves it as the replayable mod):
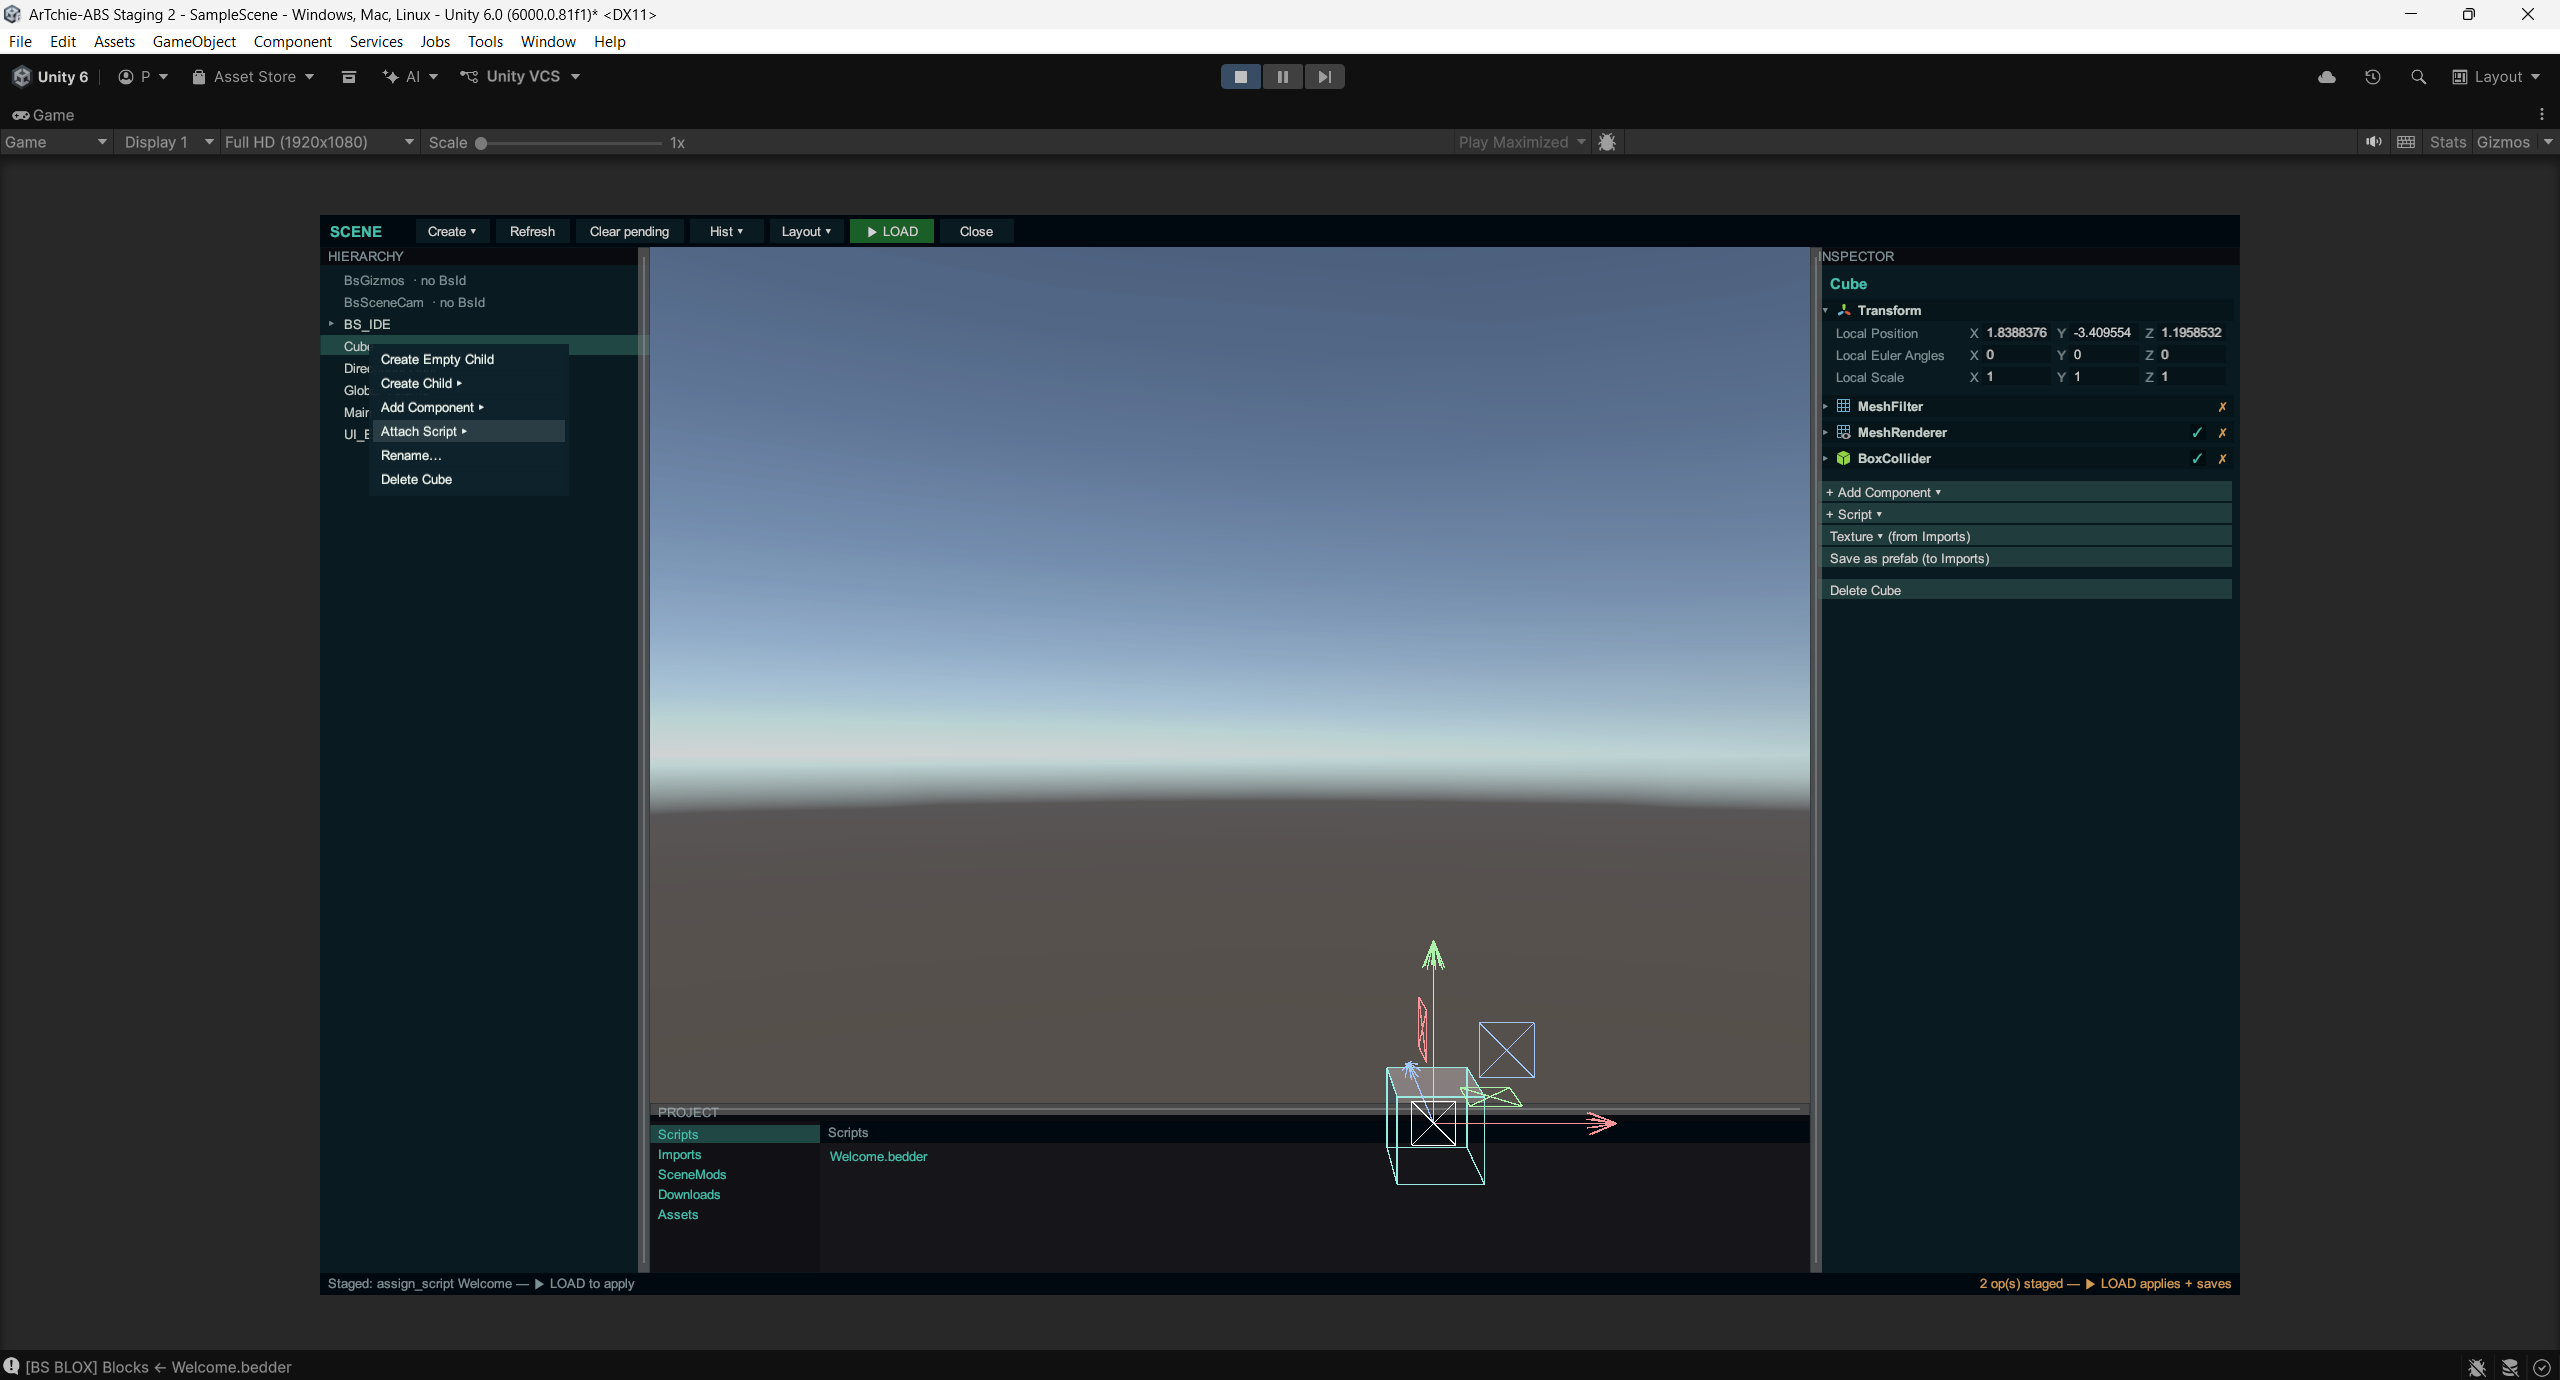
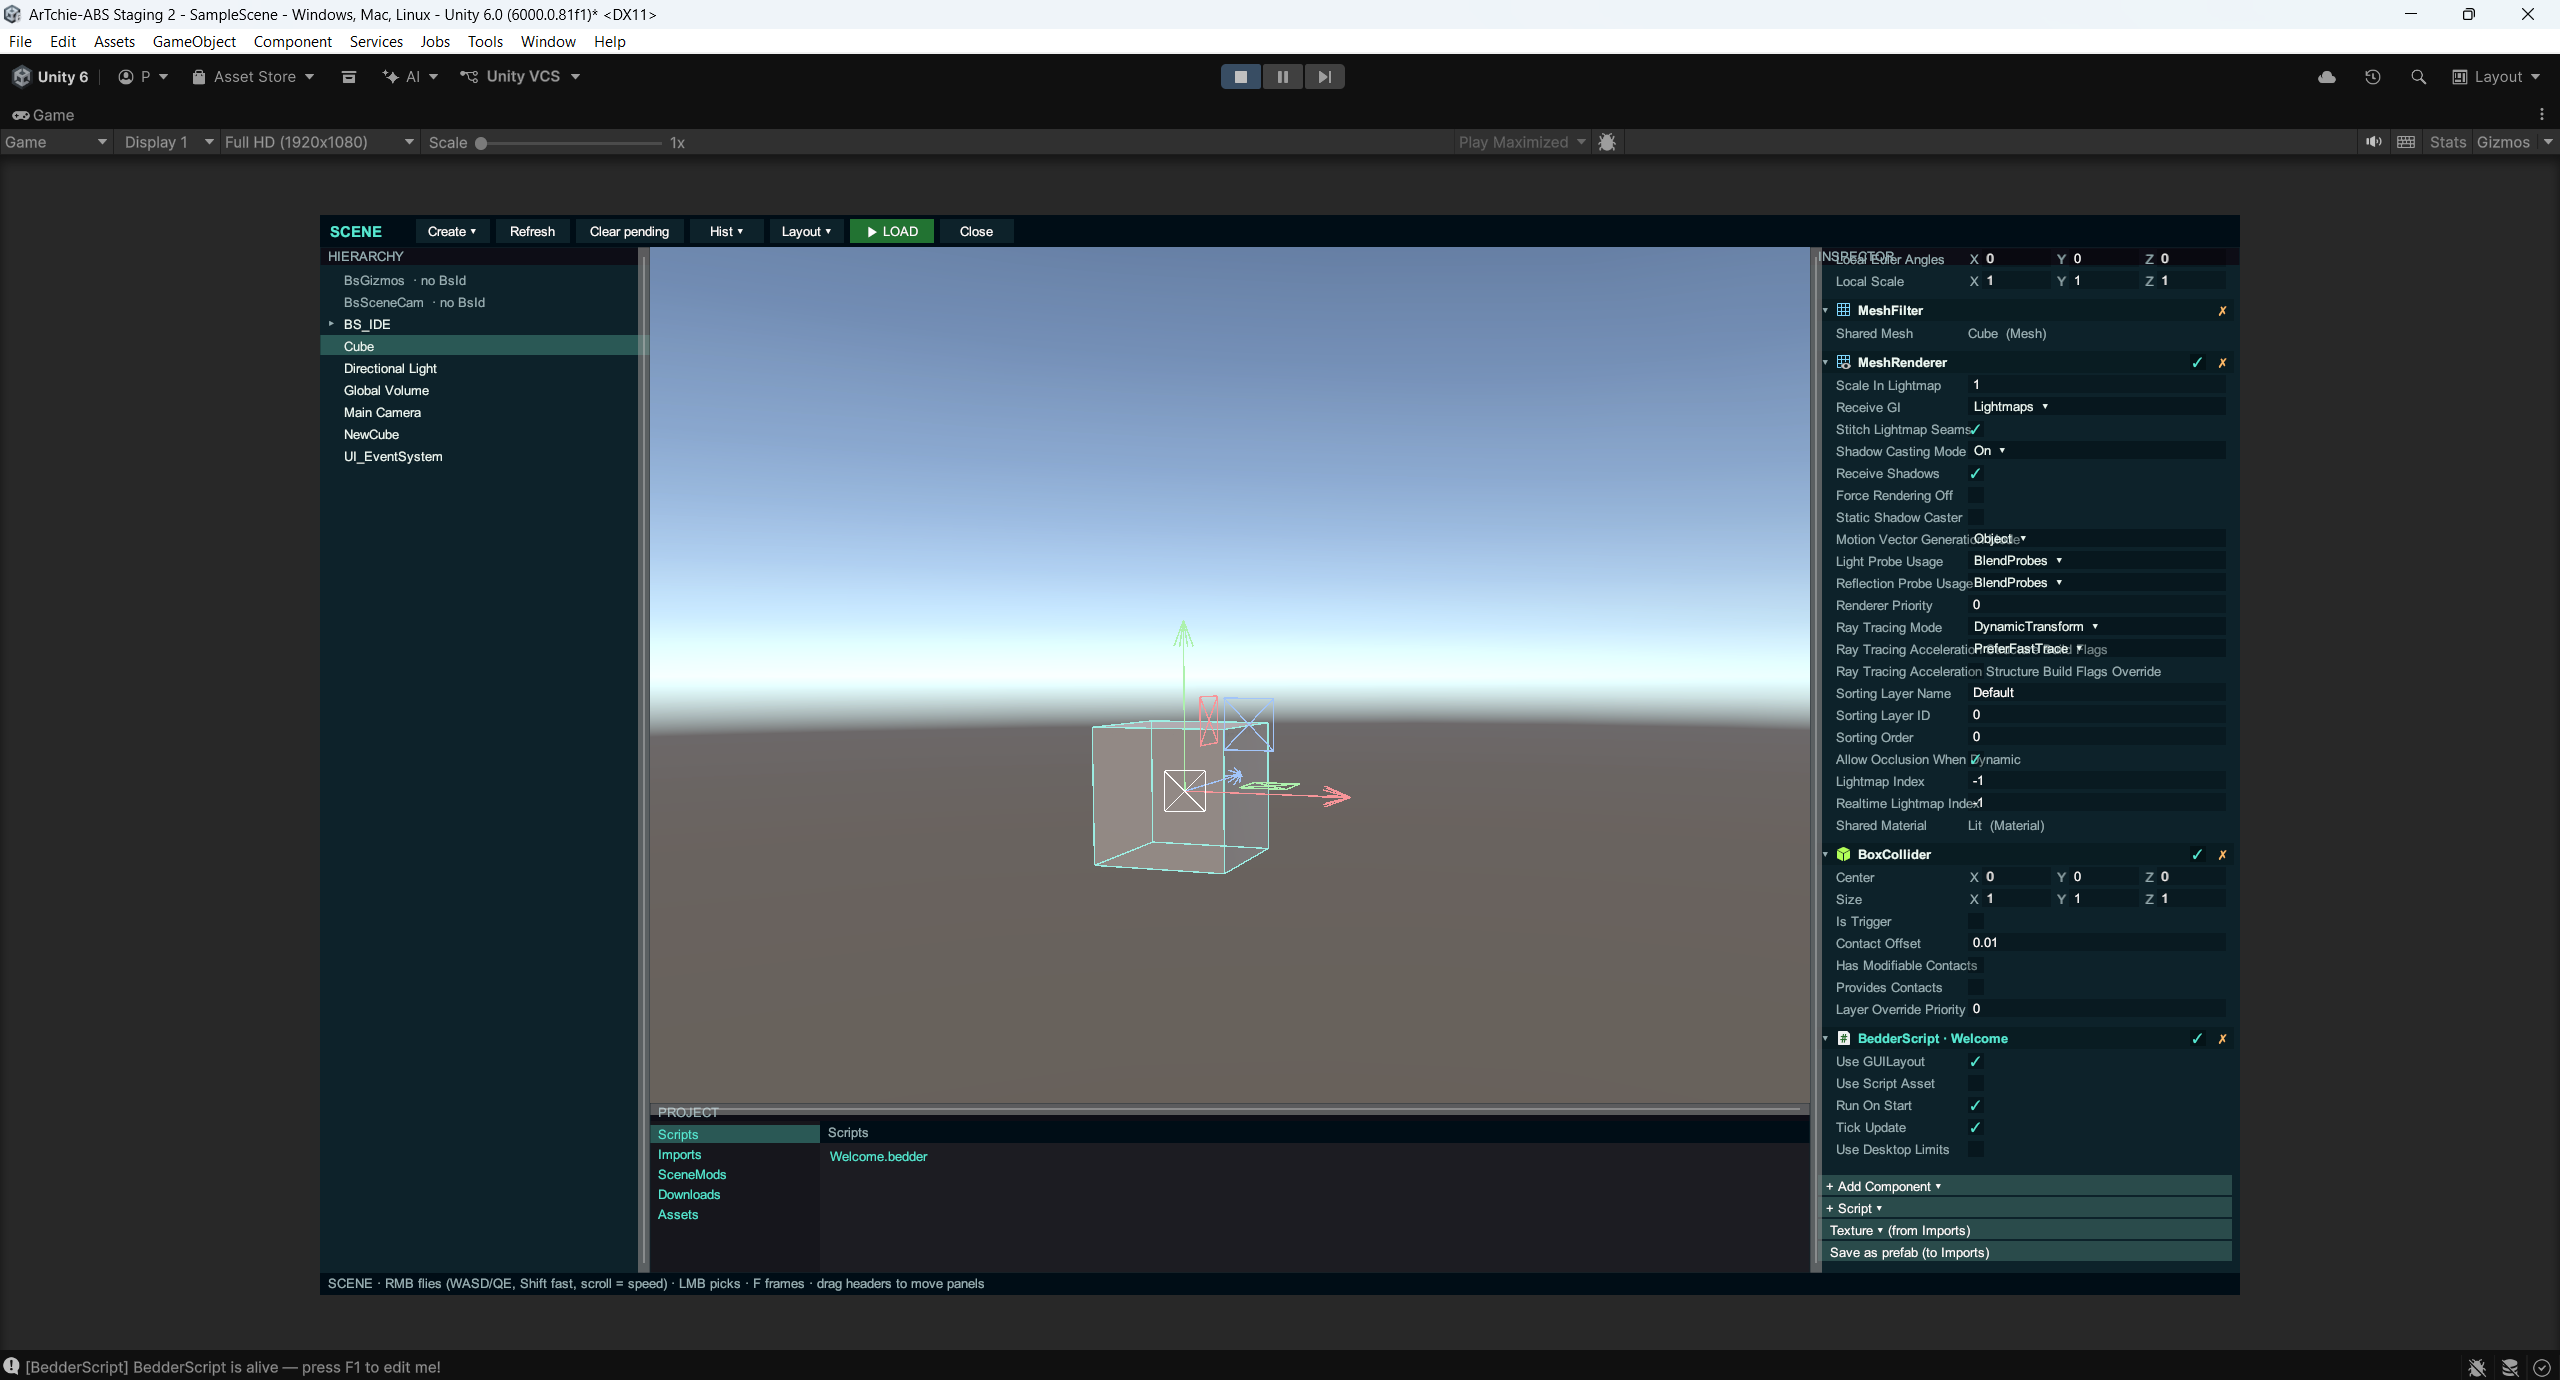
▶ LOAD, and it's live — the runner appears on the object and the script's on start()
says hello in the console:
Change the script in F1 while the game runs → ▶ APPLY → the object picks up the new behavior instantly. No recompile, no domain reload. That's the pitch.
7. Edit the scene itself
Still in F3: Create ▾ drops primitives (as safe "imposter" previews), the inspector scrubs any component value live, gizmos move/rotate/scale with snapping — and ▶ LOAD makes it all real and saves it as a mod that replays on every launch.
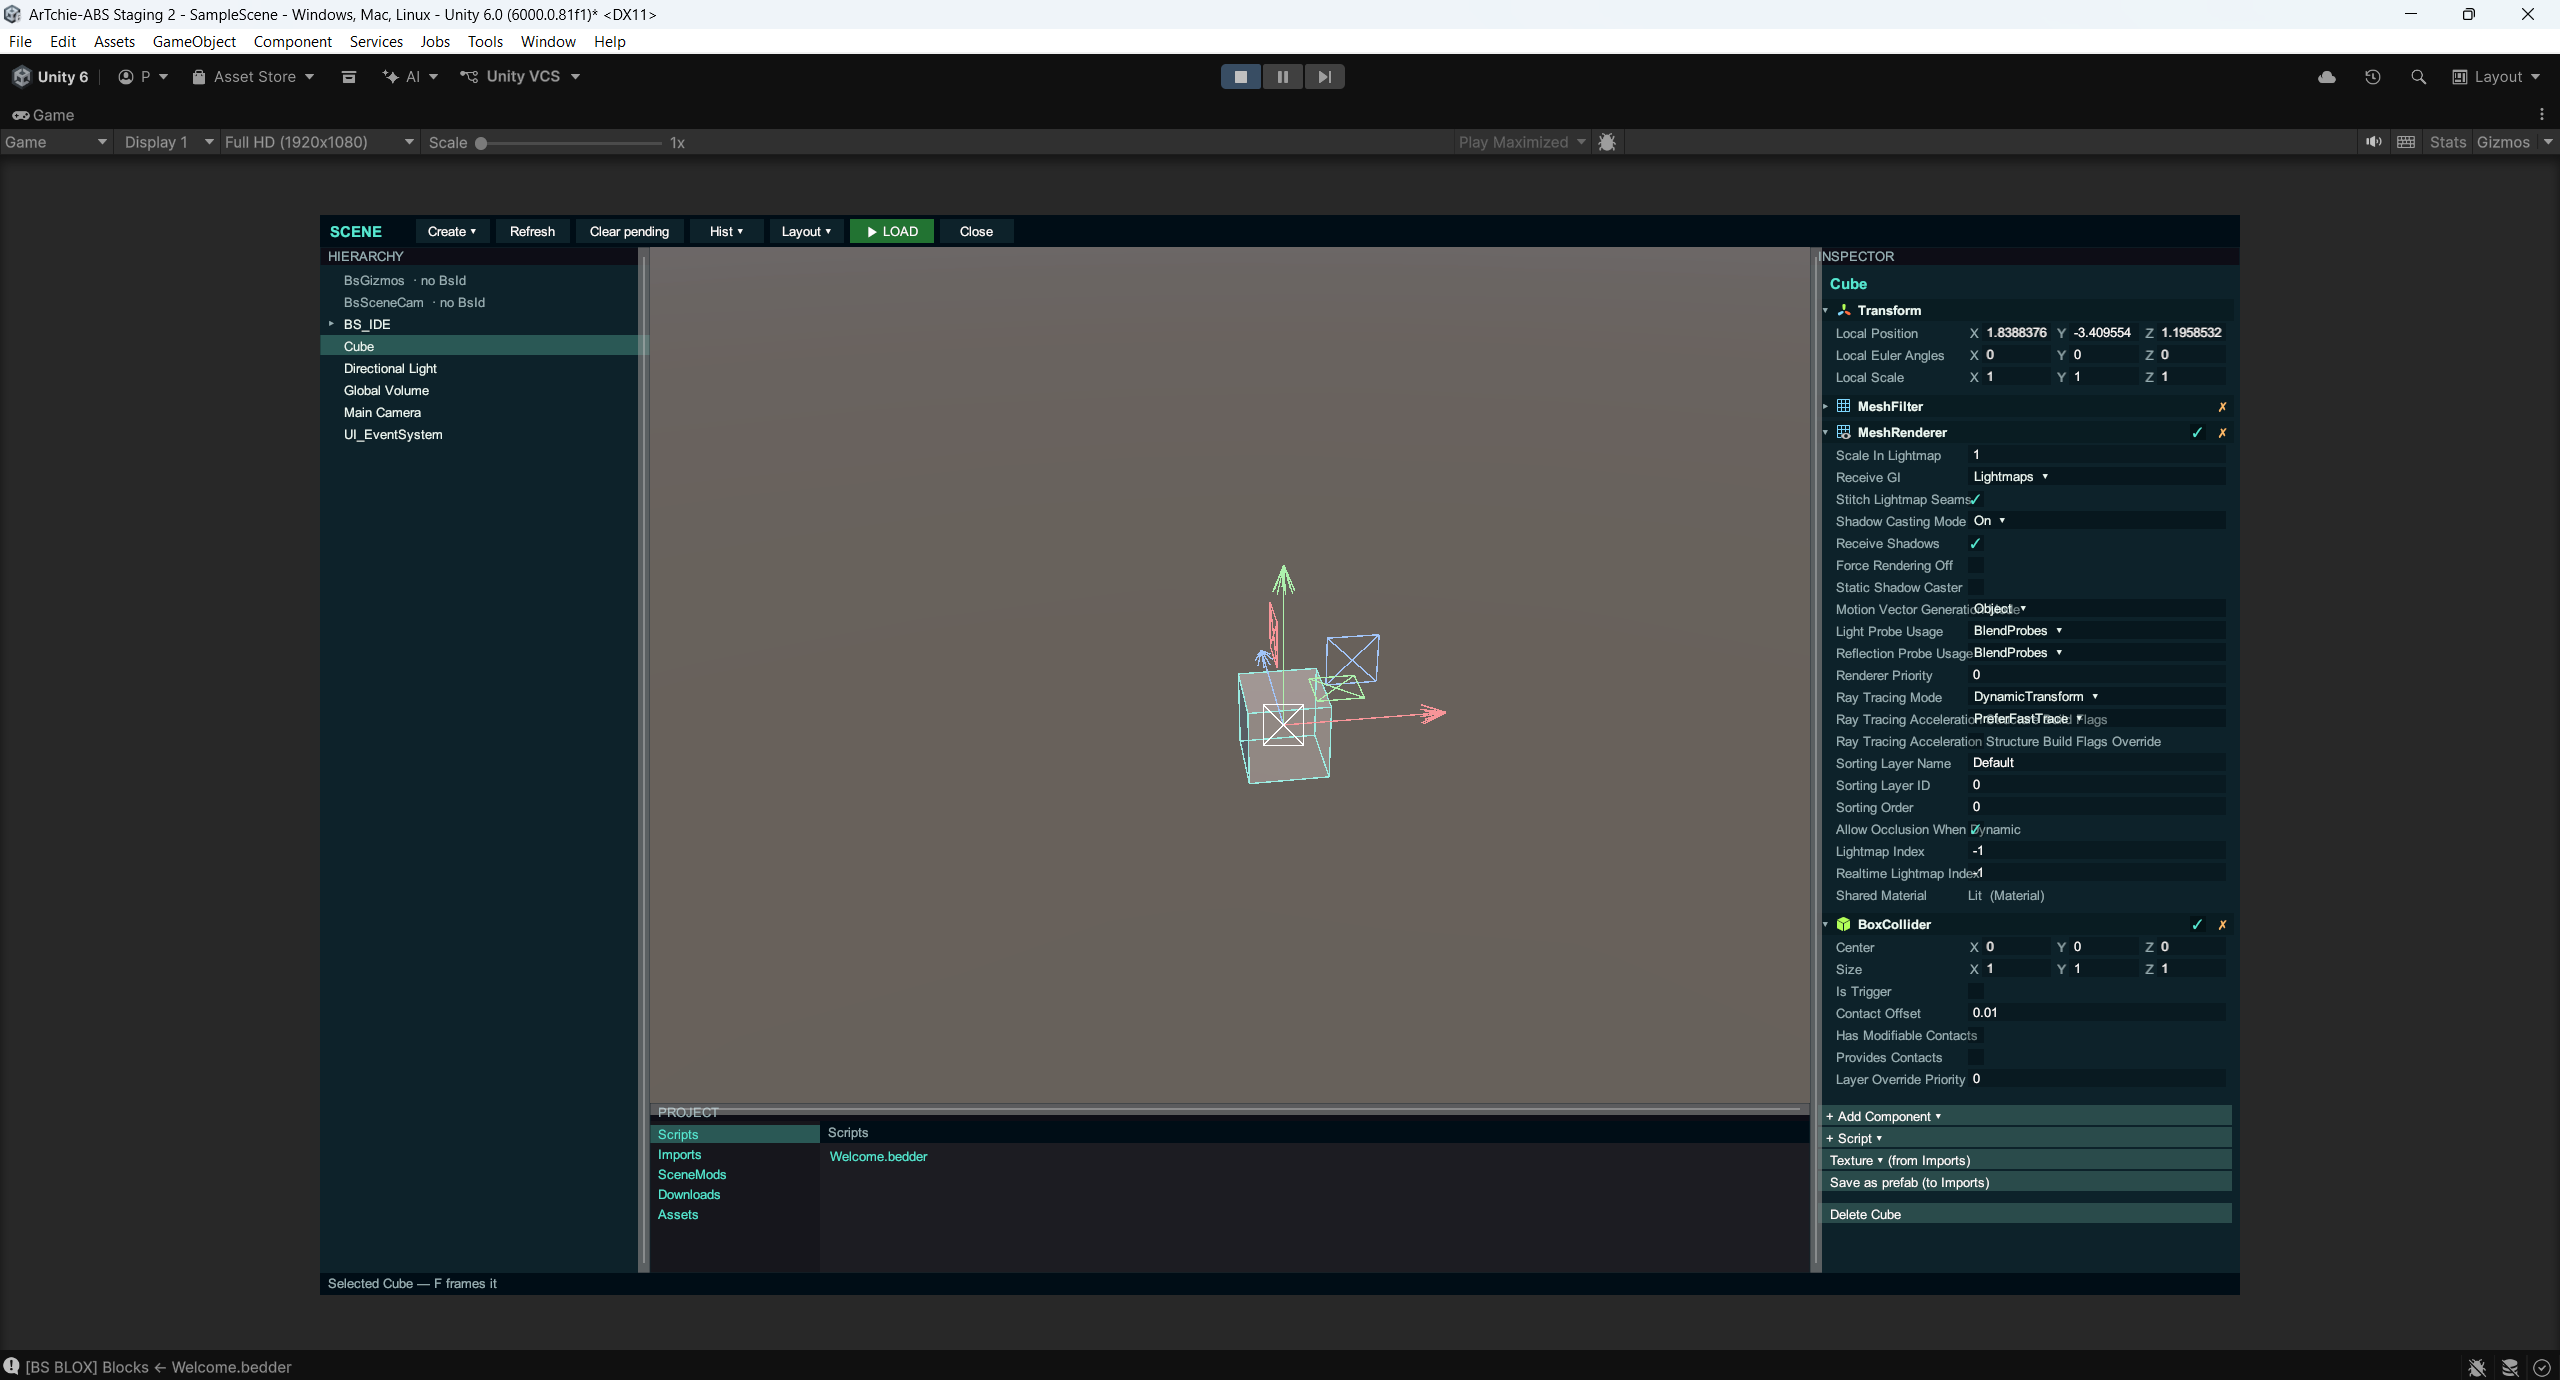
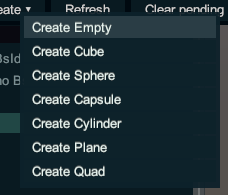
The inspector discovers every component by reflection — and renderer materials get a tint swatch: click it, pick a color, and the tint persists like any other scene edit:
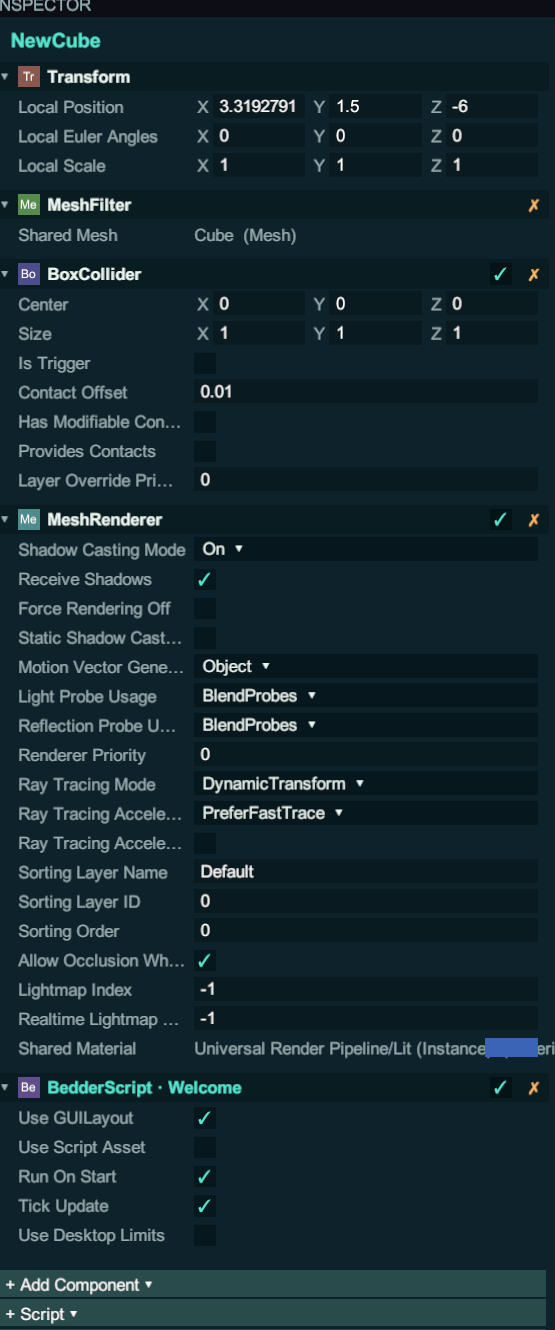
Exit Play. Press Play again. Your edits are still there.
7½. Added objects in the Unity editor later? Re-stamp.
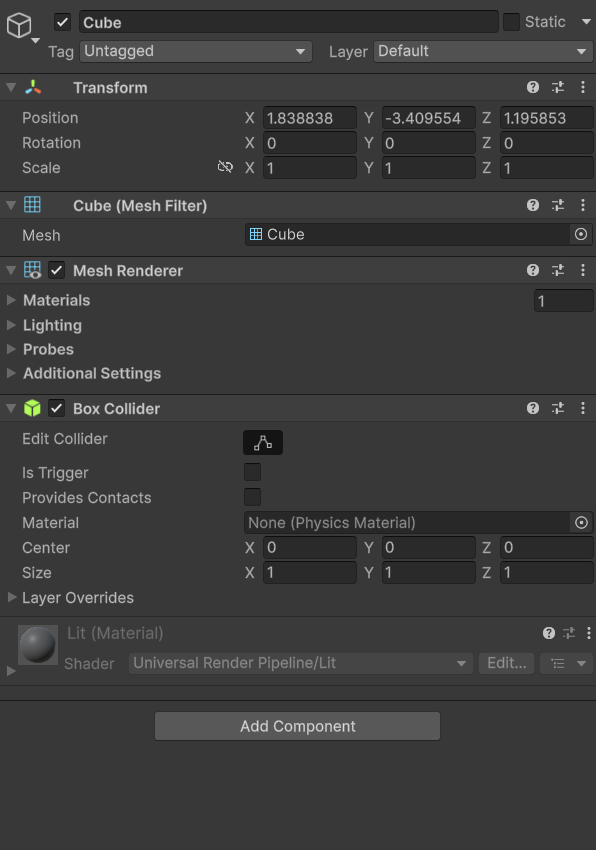
Runtime scene edits address objects by their BsId sticker — so anything you add in the Unity editor after setup needs a sticker before it's editable in-game. One menu:
Tools → ArTchie → BedderScript → Add BsIds To Open Scene
| Before | After |
|---|---|
 |
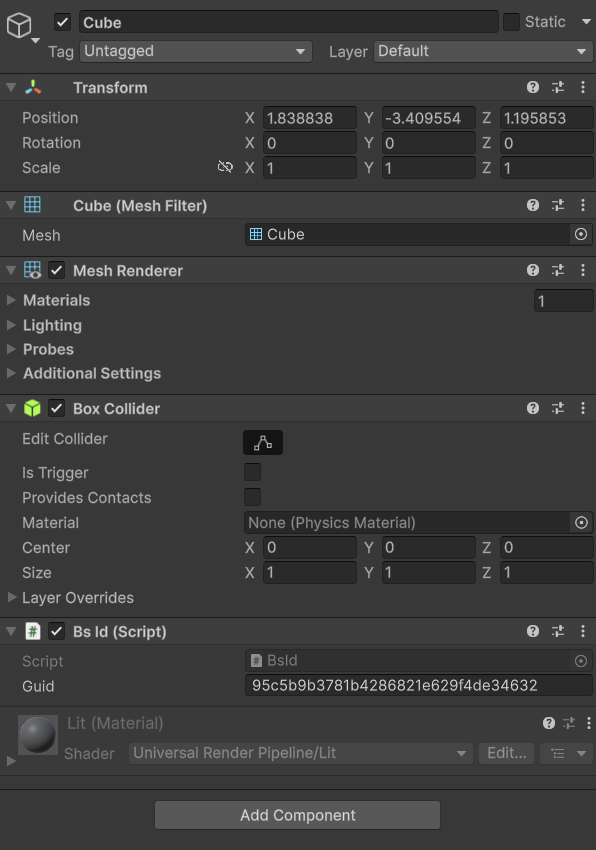 |
Safe to re-run any time: existing stickers are never touched — only new objects get new ones. The Console says exactly that:

(Tip: run it once more right before you ship a build, so everything you added is addressable.)
8. Bring in your own assets — the Library
The Scene panel's Project window is a real dual-pane file explorer: folder tree on the left (arrows fold, they don't navigate), contents on the right — click selects, double-click opens, exactly like Unity's own Project tab.
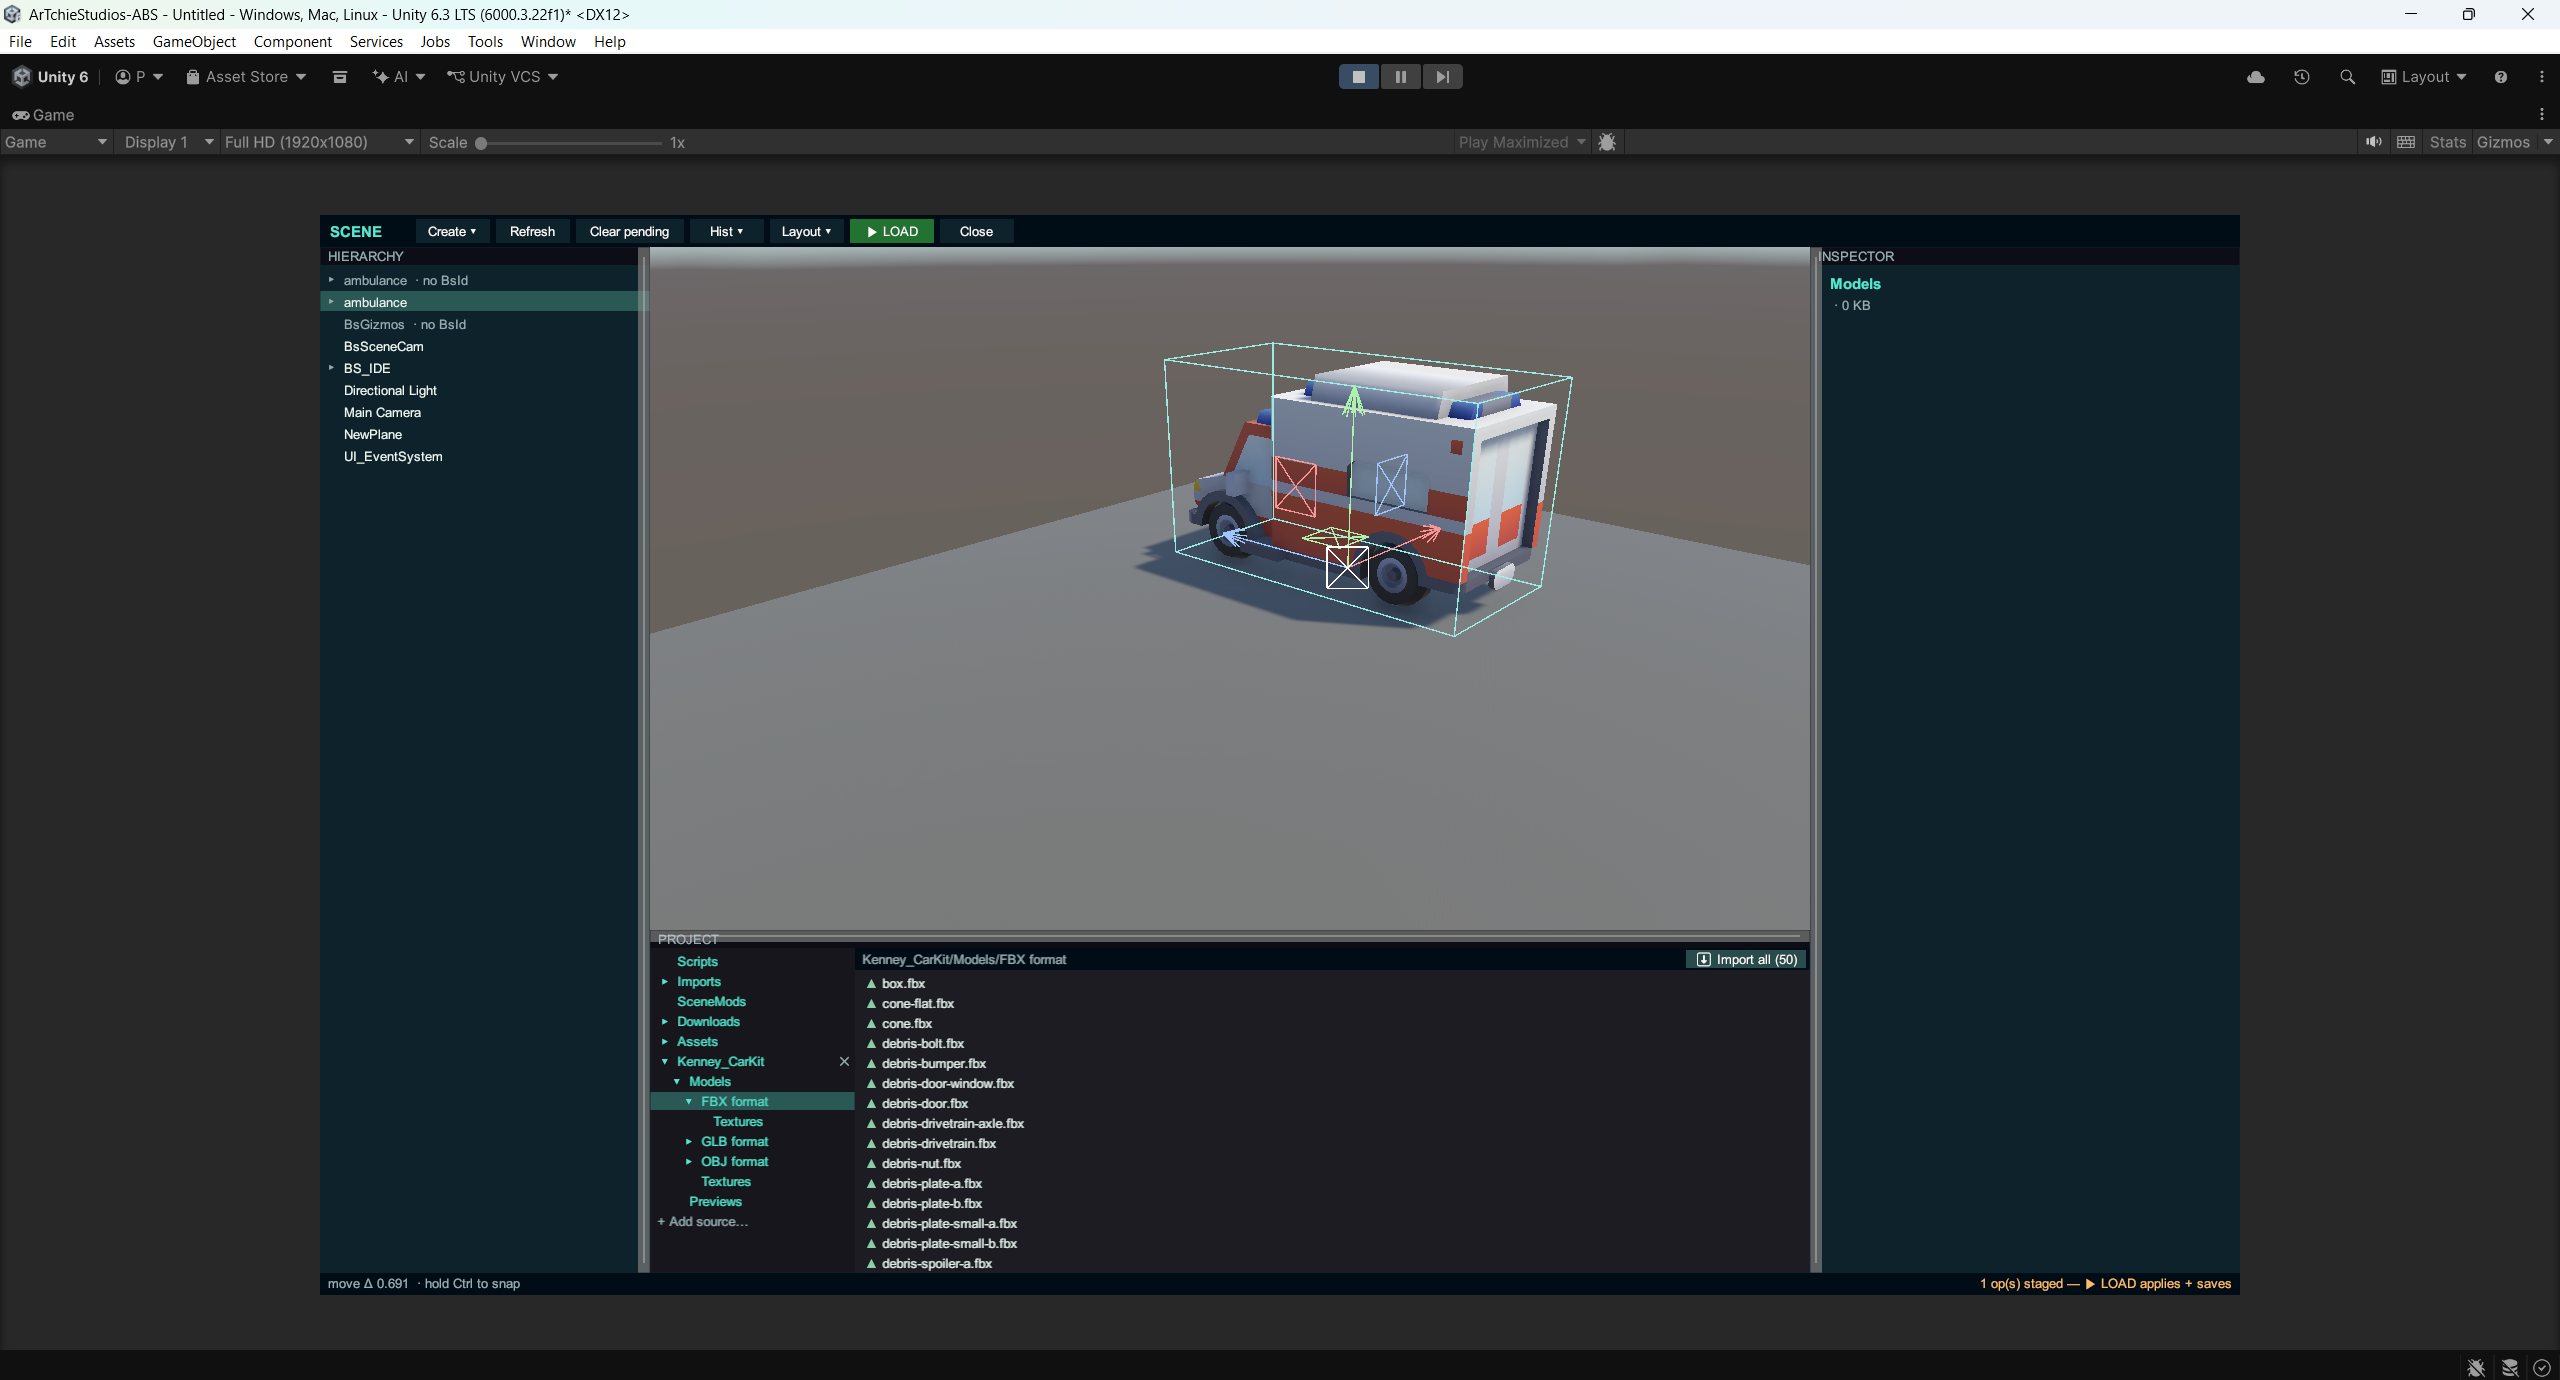
Out of the box it shows Scripts, Imports (your asset Library), and SceneMods — and + Add source… opens the real system folder dialog, so any folder on the machine becomes a browsable source. Sources persist per product; the ✕ on a row forgets one.
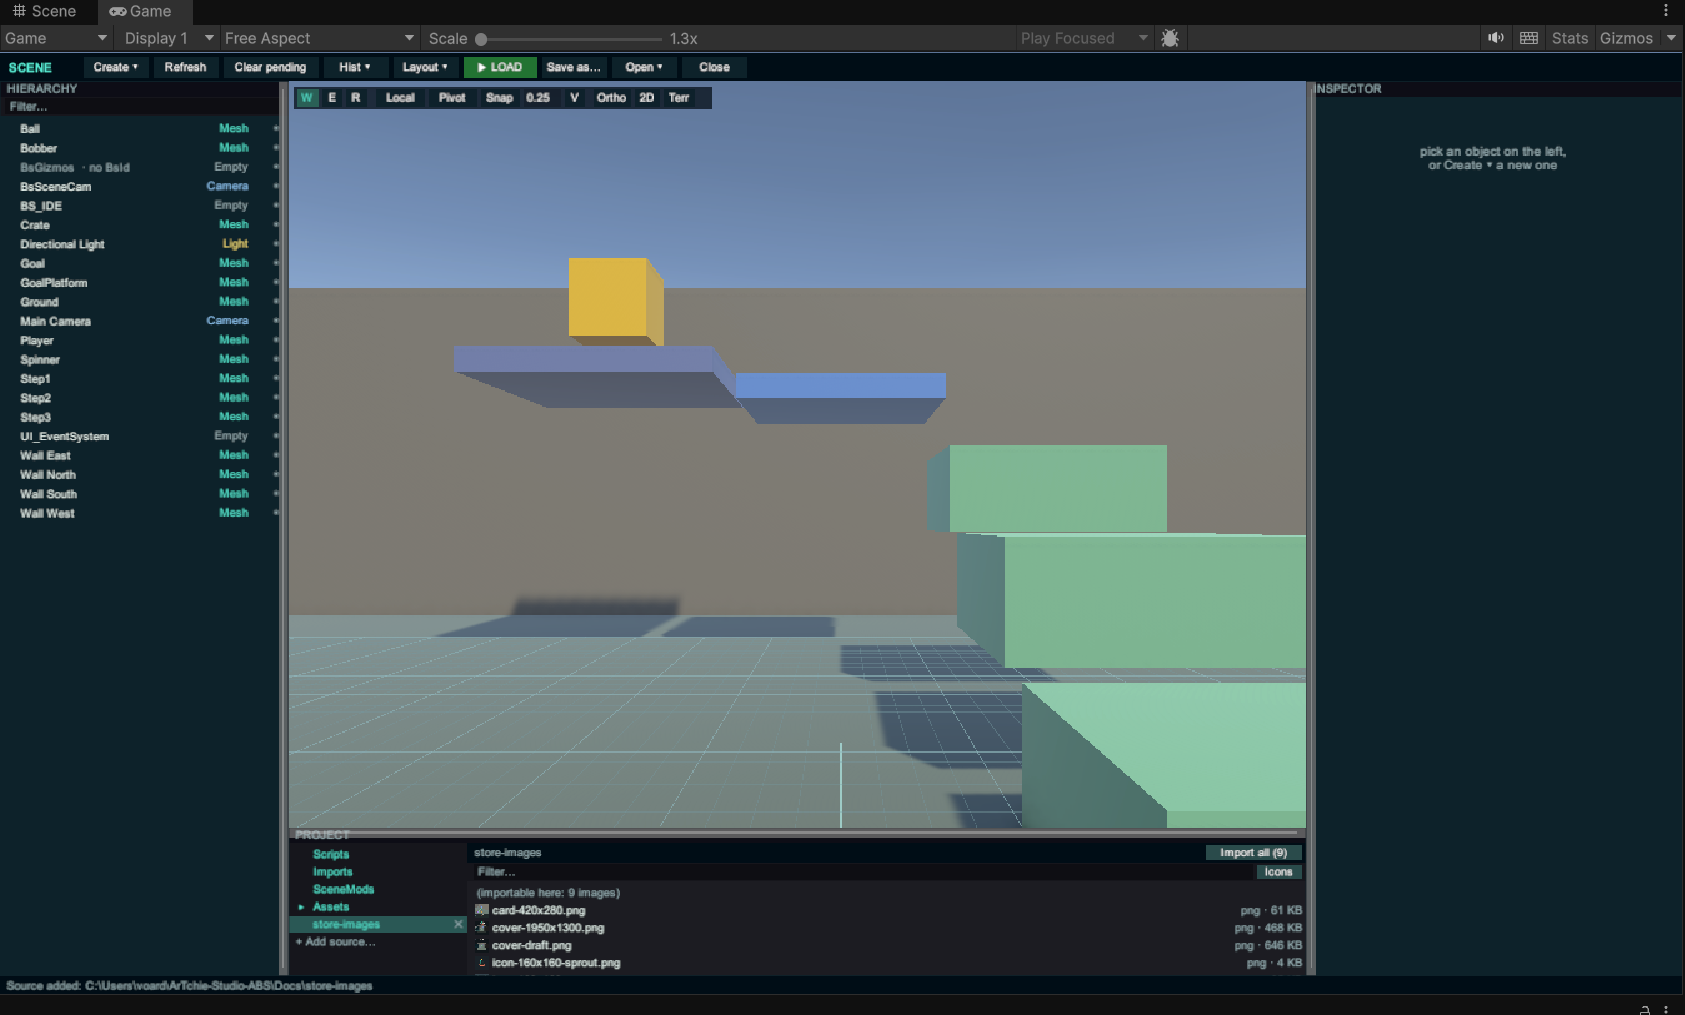
Selection works like an explorer too: click, shift+click a range, ctrl+click to toggle — then ⬇ Import (N), Move ▾, or Delete (N) act on the whole set, and ⬇ Import all takes an entire folder in one go. What's supported:
| Type | Formats |
|---|---|
| Images | .png .jpg .tga |
| Audio | .wav .ogg .mp3 |
| Models | .obj (with runtime MTL + textures) · .fbx (in-house importer — binary 7.x, the older big-endian 6.x, and ASCII; static meshes, submesh materials, diffuse textures incl. .tga) · .glb/.gltf (optional glTFast) · .bsmesh |
Imports land sorted and self-contained: each model becomes a bundle folder under
Models/ with its textures beside it, images go to Textures/, audio to Audio/ — and
+ New folder + Move ▾ let you organize it your way. Files are copied into the
Library (deduped, 50 MB cap), so imports never depend on the source folder afterward.
Using them is drag and drop: drag a model into the viewport to place it, drag a texture onto an object to apply it (textures never place as objects — same law as Unity), click any import first to preview it and pre-configure components or scripts before it ever touches the scene. ▶ LOAD makes it real and replayable, like every other scene edit.
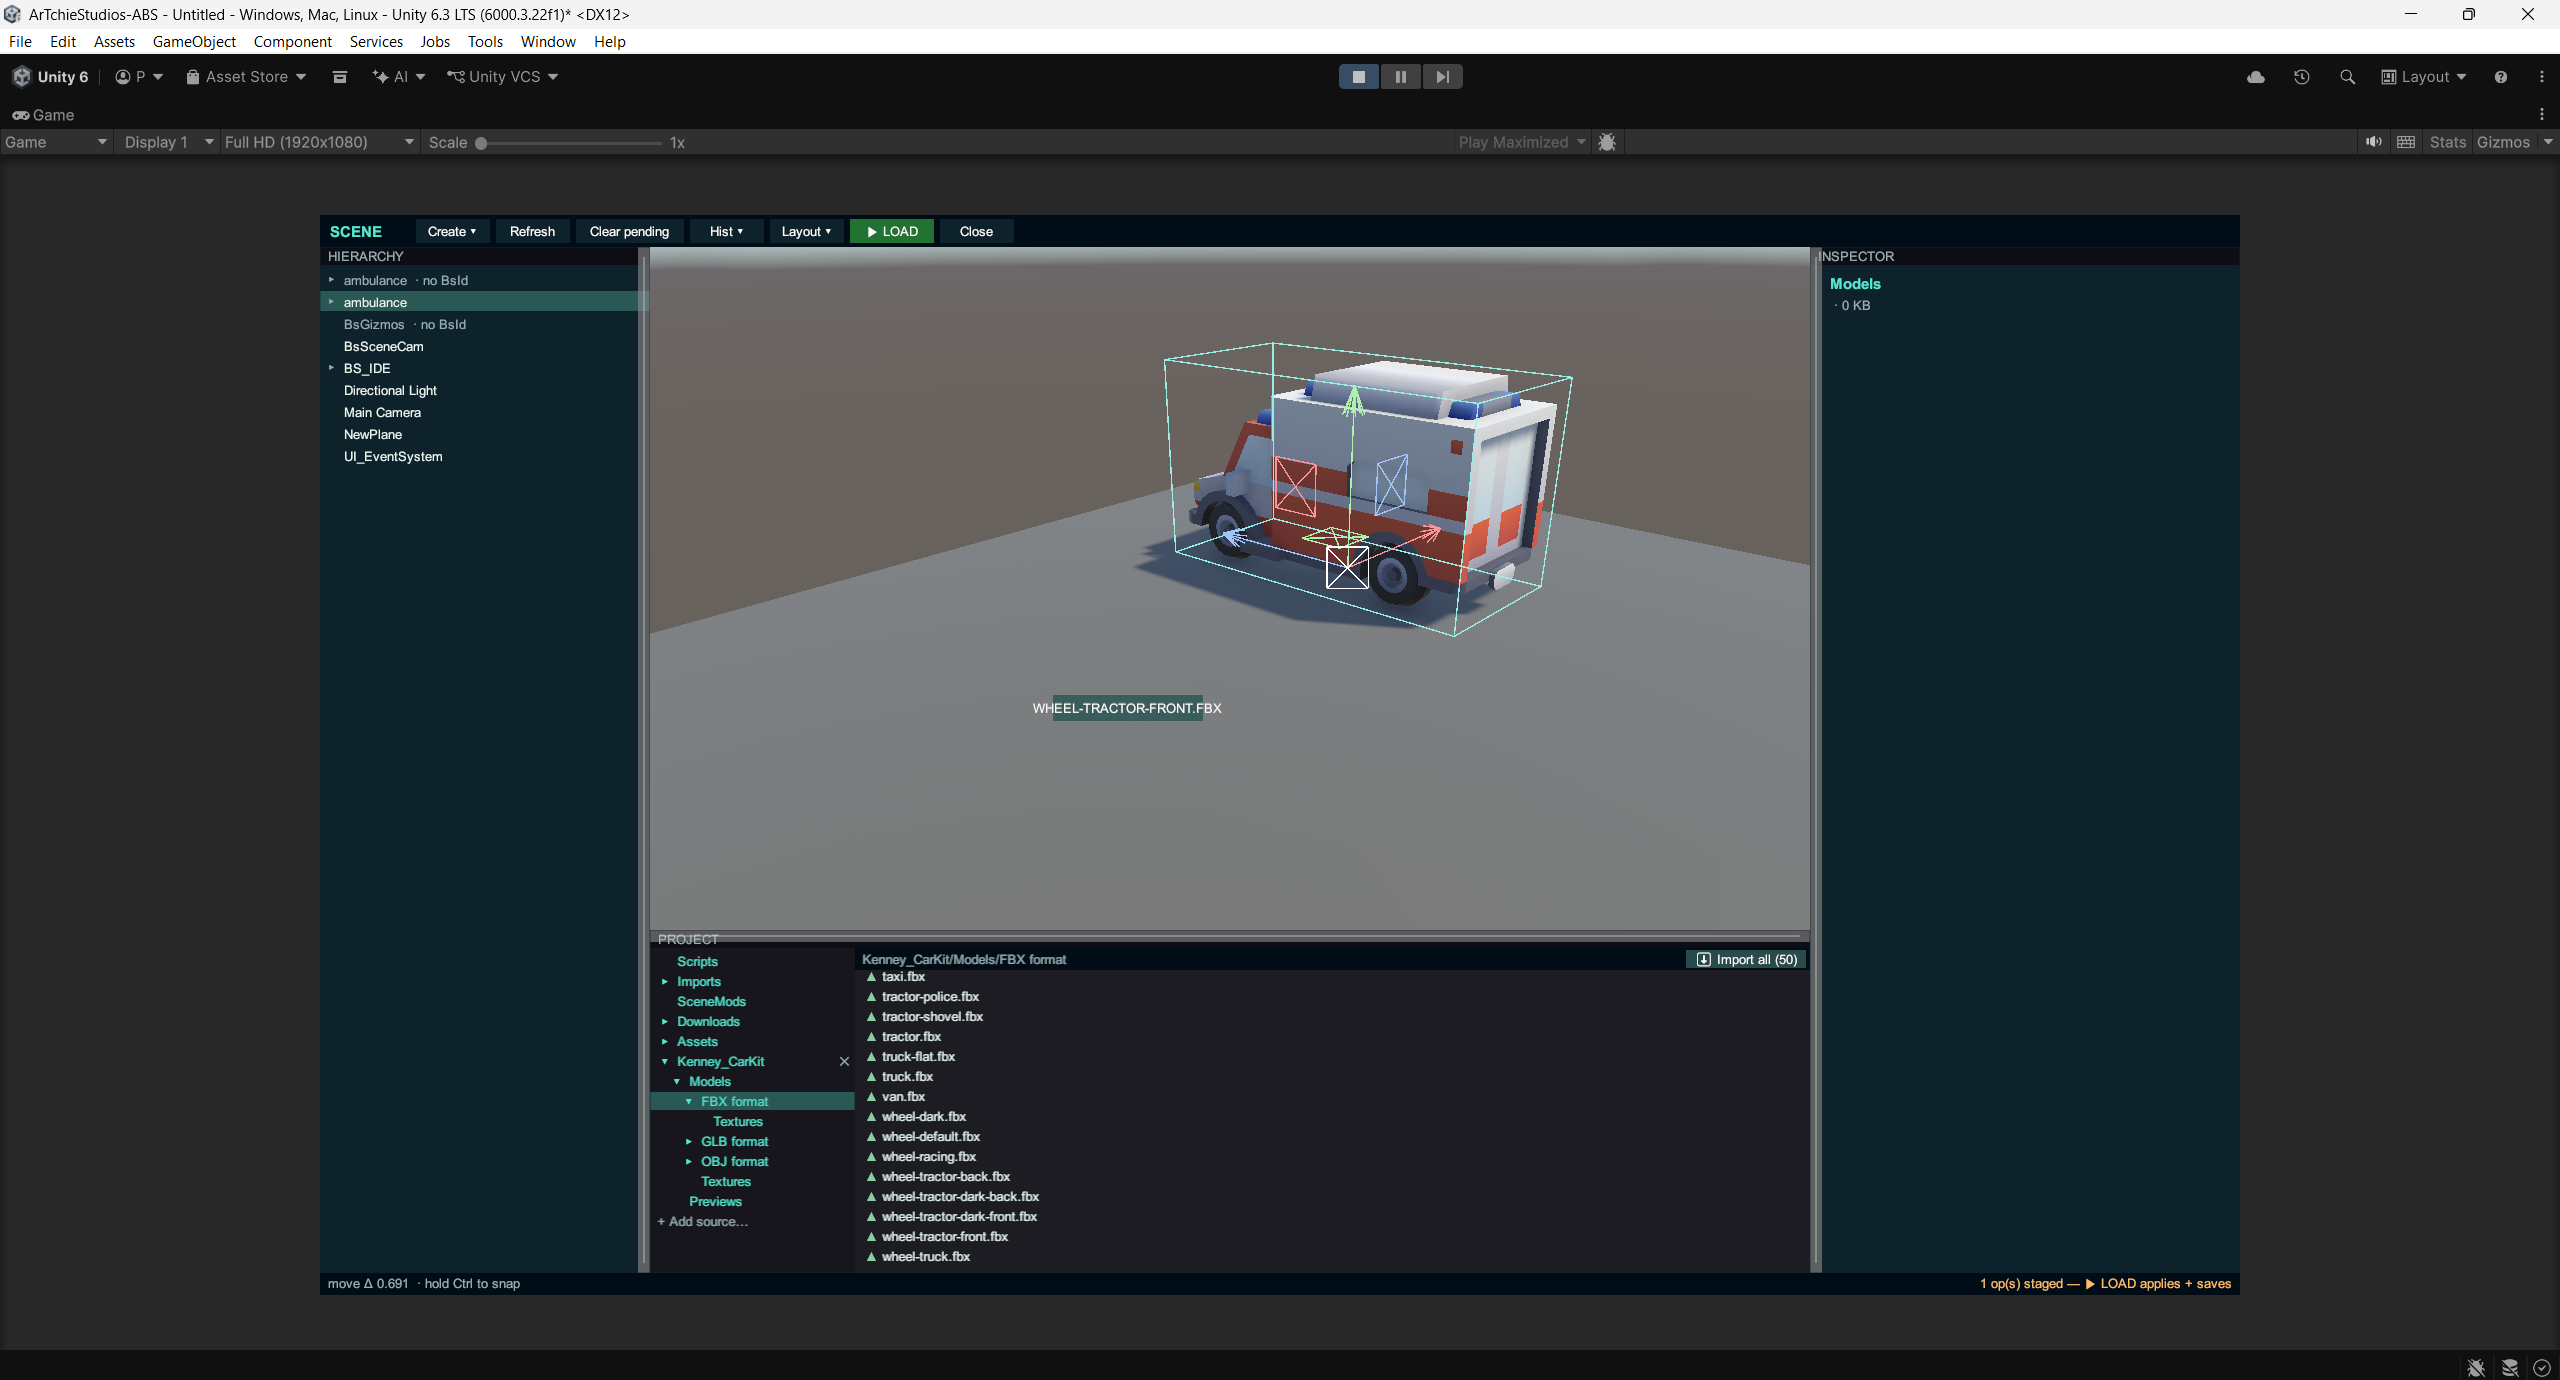
Select an import first and the inspector shows its ON PLACE panel — components and scripts you add there ride along with every future placement of that asset:
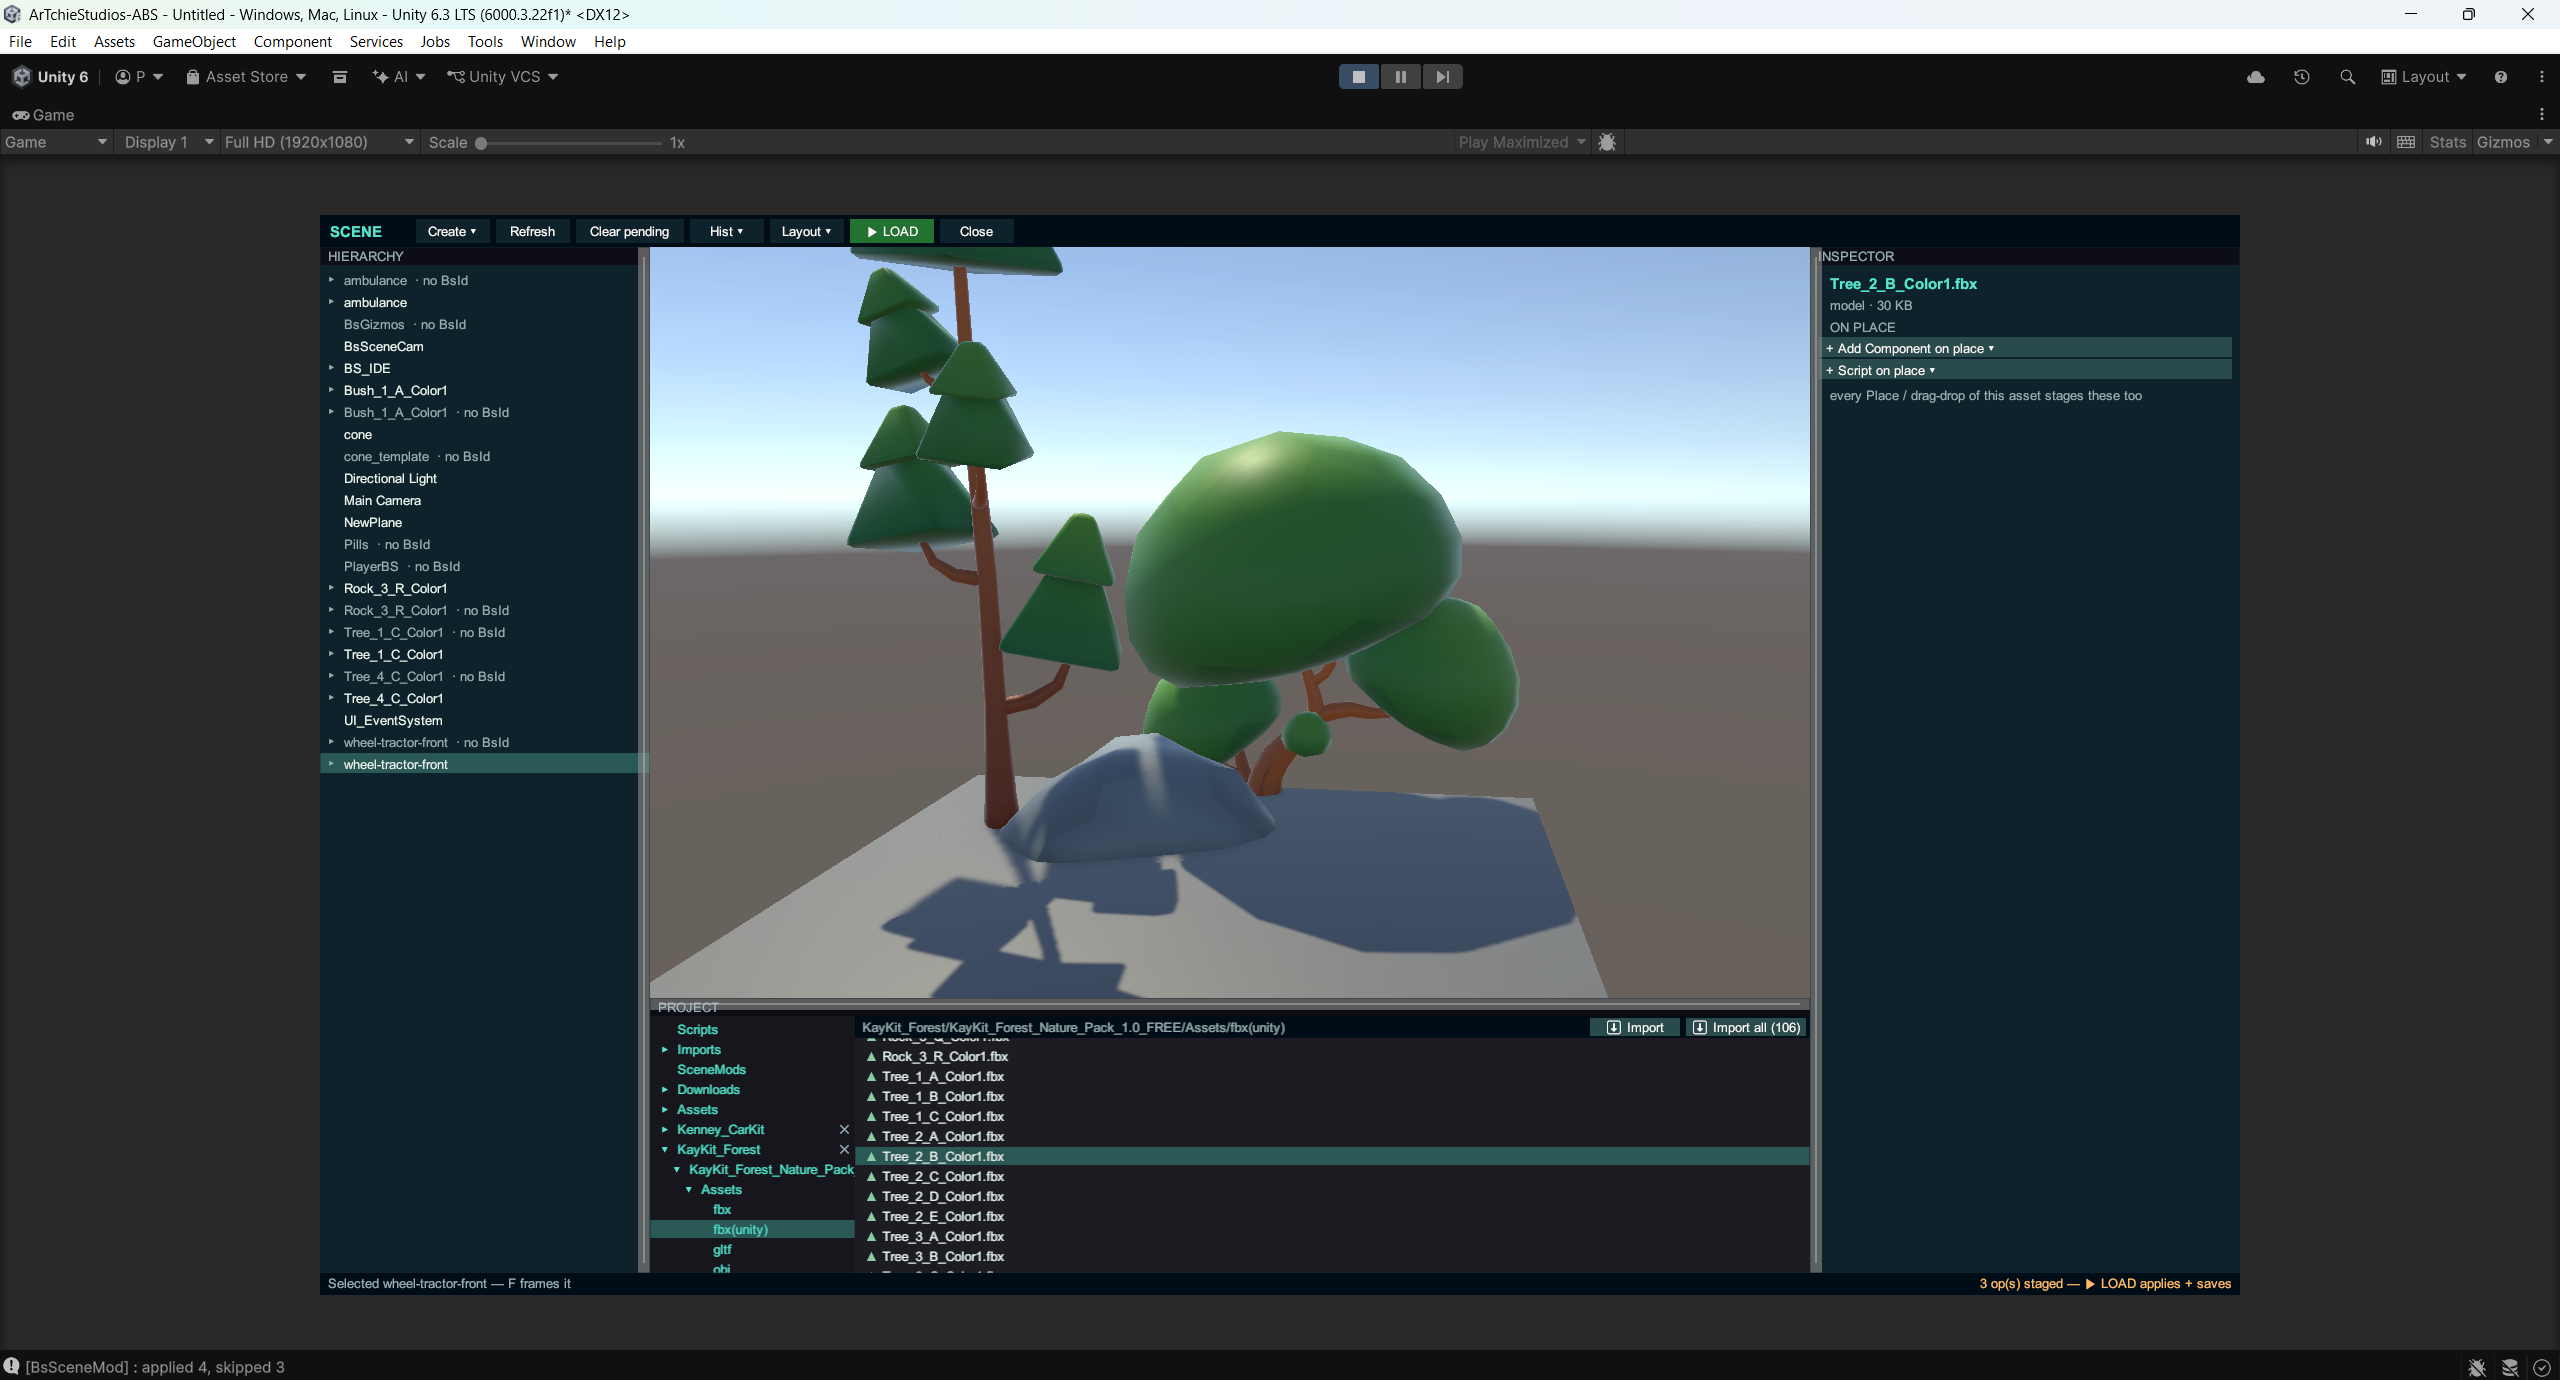
9. Import a whole Unity package — or an ABS Pack
Got a .unitypackage? Select it in any source folder → ⬇ Open package… → the
familiar dialog: a collapsible folder tree with per-item and per-folder ticks and a
progress bar while it works.
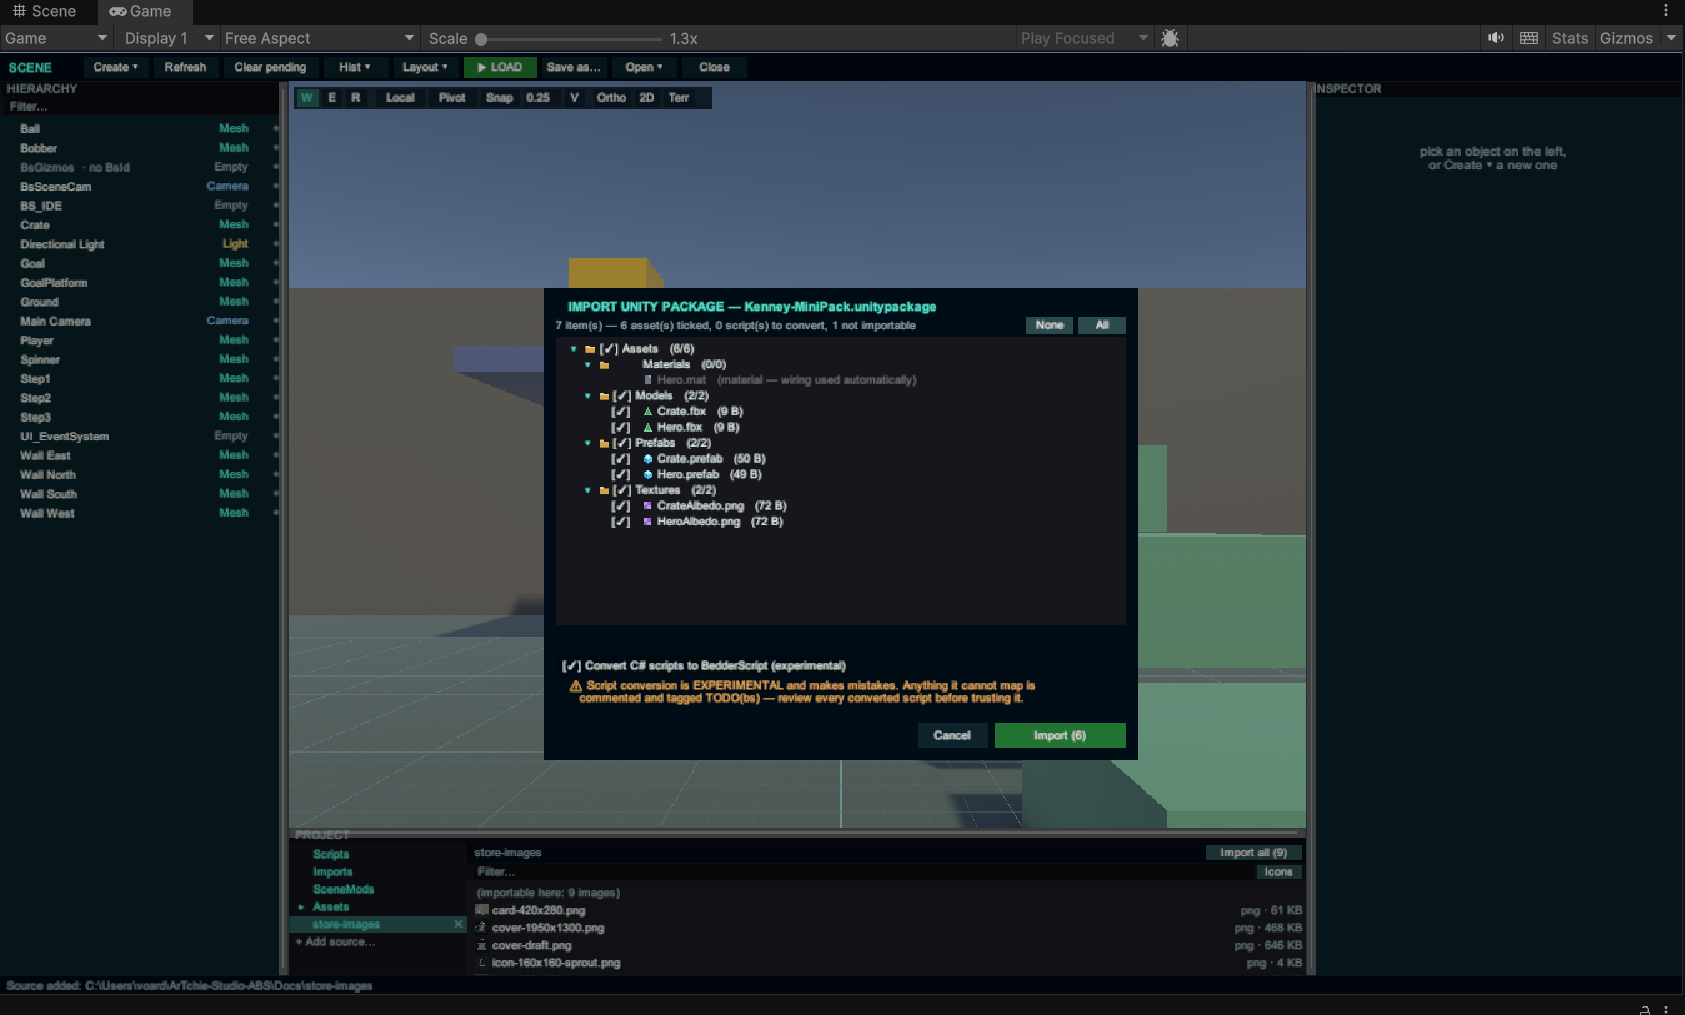
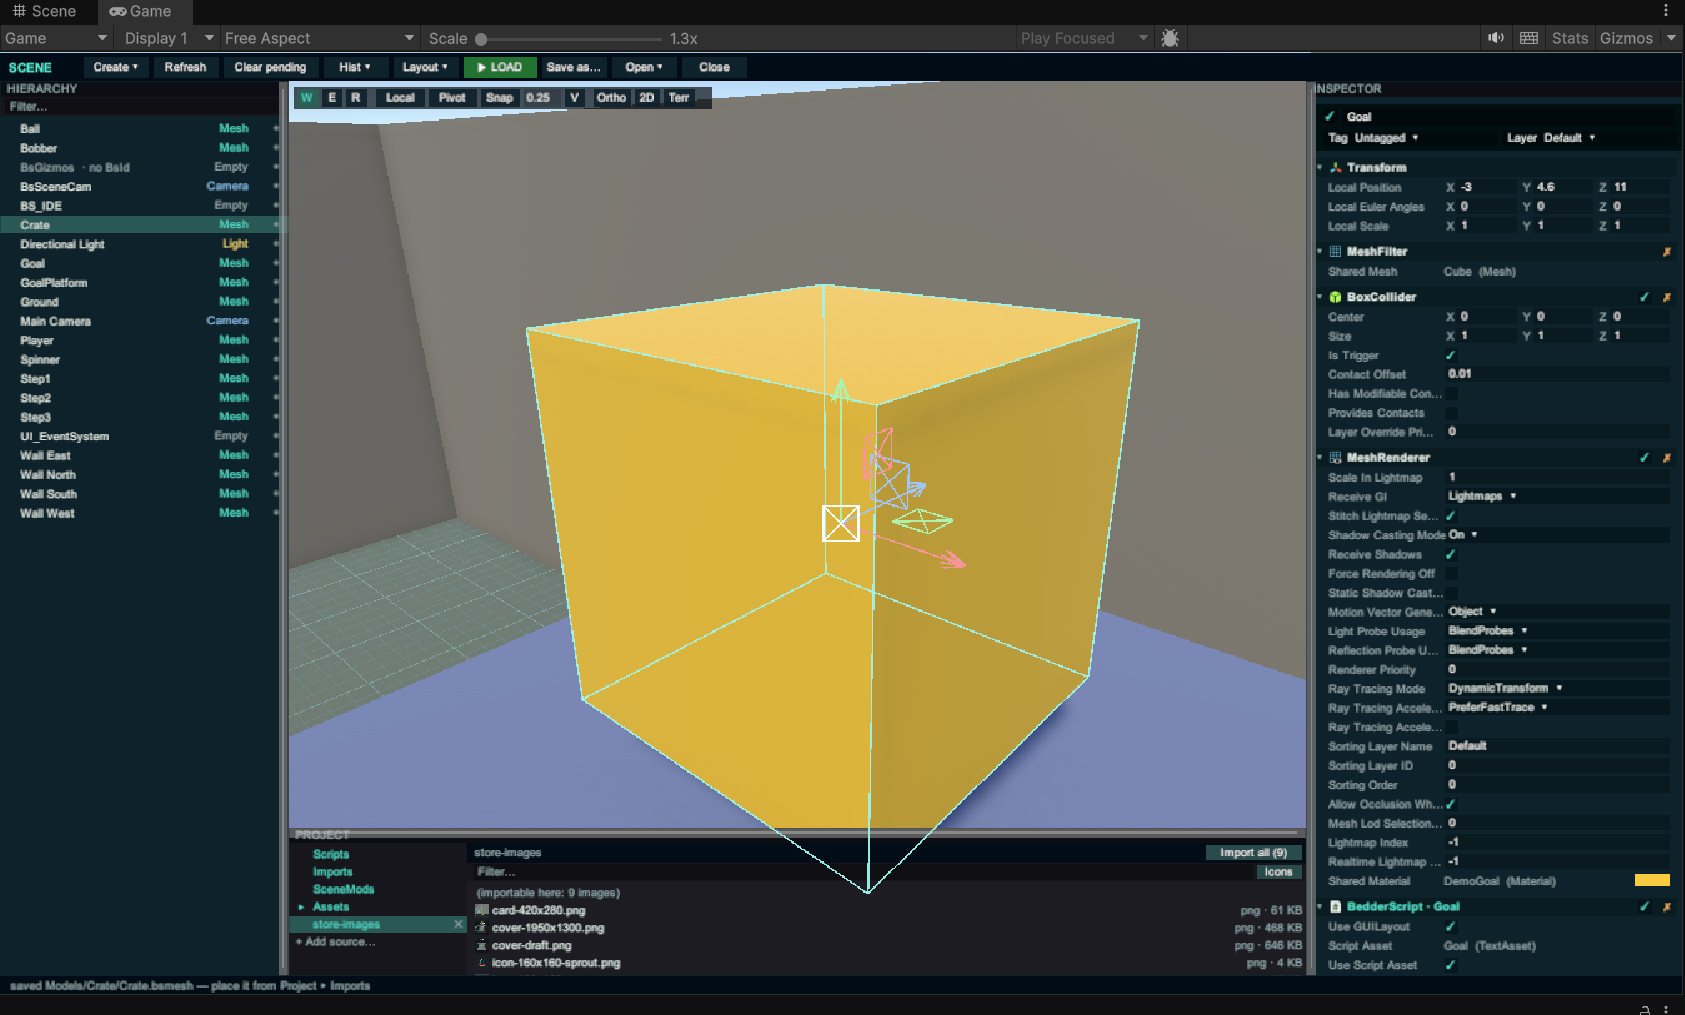
Everything lands at the same paths the tree showed, under Models/ Textures/
Audio/ Prefabs/. The importer reads the package's own .mat and .prefab wiring, so
prefabs come in as placeable units with the right texture on the right submesh —
atlas-textured art packs included:
Two honest notes on the ticks:
.bedderfiles in a pack go straight to the scripts folder.- Convert C# scripts is optional and off by default — the converter is a
translator assistant that makes mistakes; everything it can't map is commented and
tagged
TODO(bs)for a human to review.
ABS Packs are the same dialog, made for your game. An .abspack is a targeted
modding pack — the dialog shows its name and author in the title. Authors make one in the
Unity editor with Tools → ArTchie → BedderScript → Export ABS Pack…: pick models, textures,
audio, .bedder scripts, and prefabs (baked to a single placeable mesh, with each
material's albedo texture shipped beside it and rewired on import), fill in the manifest,
export.
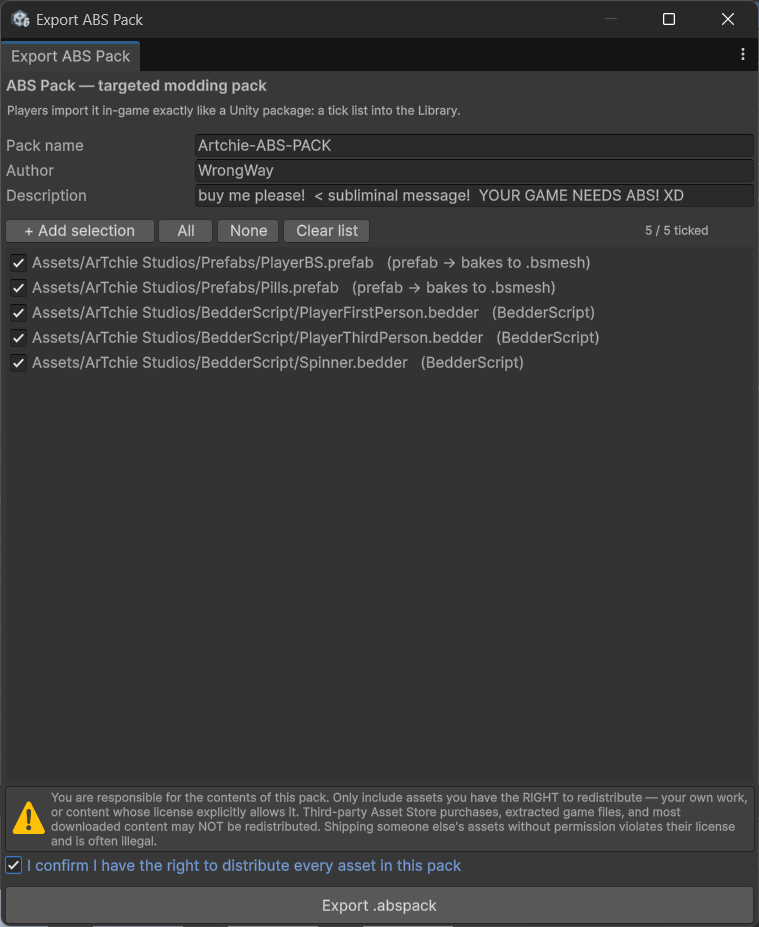
The rights gate is deliberate: whoever exports a pack is responsible for having the right to redistribute everything in it. The Export button stays disabled until that's confirmed — your own work or explicitly-licensed content only.
10. It ships with your game
Nothing to configure:
- The included build hook mirrors your
BedderScript/scripts folder into every player build automatically. - On first run, players get their own editable copies at
Documents/<YourGameName>/Scripts— the IDE's Save bar shows the full path. - Player edits survive relaunches AND your game updates (only files they never touched get refreshed).
- Want saves somewhere else? Set
BsScriptStore.UserScriptsRootOverrideat boot.
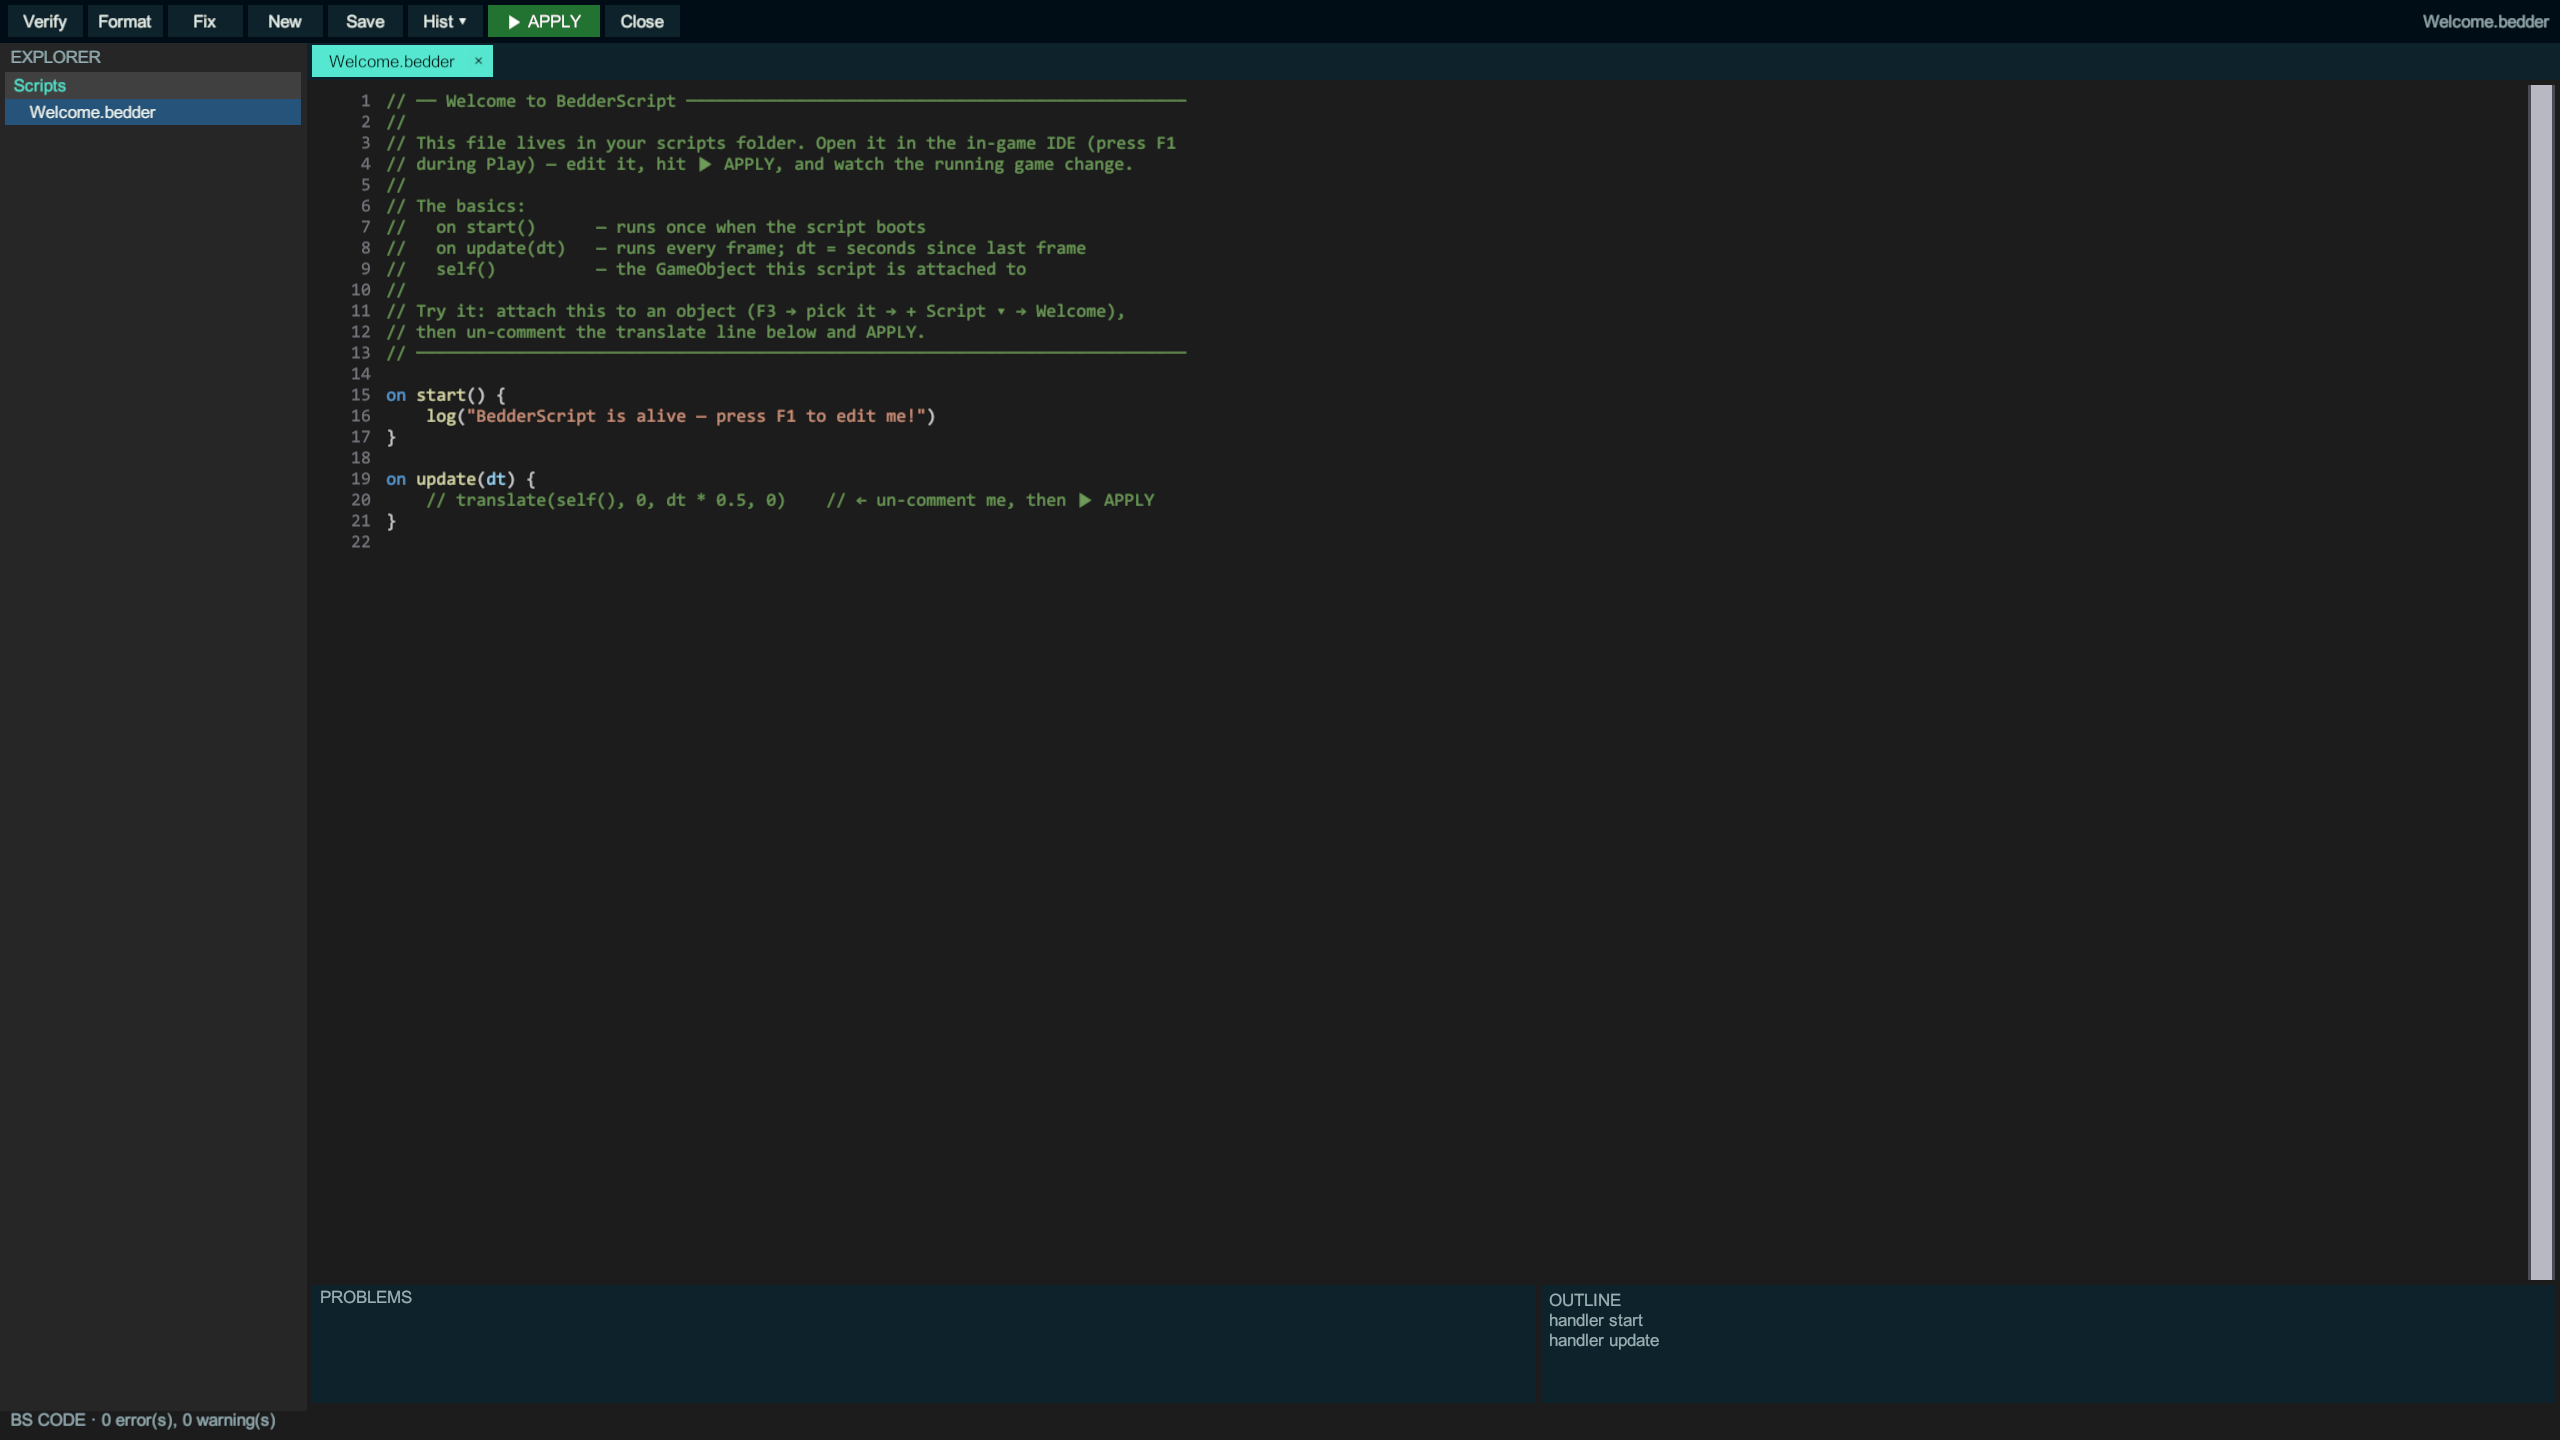
The shipped game, running — the same Welcome.bedder you authored in the editor, open in
the build's F1:
And when a player makes their own script in your shipped game, Save tells them exactly where it lives:
Where to next
- MANUAL.md — the full language + engine API reference (everything in it runs today)
- SECURITY.md — the sandbox model, if you're letting players or modders run scripts
- F4 any time something surprises you — that's what it's for
ArTchie Studios · ArTchie-Bedder-Suite
Source: site content (not shipped in the box): GETTING-STARTED.md